If you want to send your PowerPoint presentation to someone or publish it on social media, it is usual to turn it into a video. But if you don´t know how this works, you are perfectly right here!
Basically, there are two different types of timings. You can choose between fixed and personalized timings. So you can also determine how long a single slide is displayed and control it yourself. The detailed instructions are explained in the following blog.
Fixed slide timings
This option sets a fixed time for all slides, for example each slide will be visible for 5 seconds before the next one is displayed. If you have included animations in your presentation and they last longer than the set duration of the slides, the animation will still be played in full length, regardless of the set duration.
Video
Step by Step Tutorial
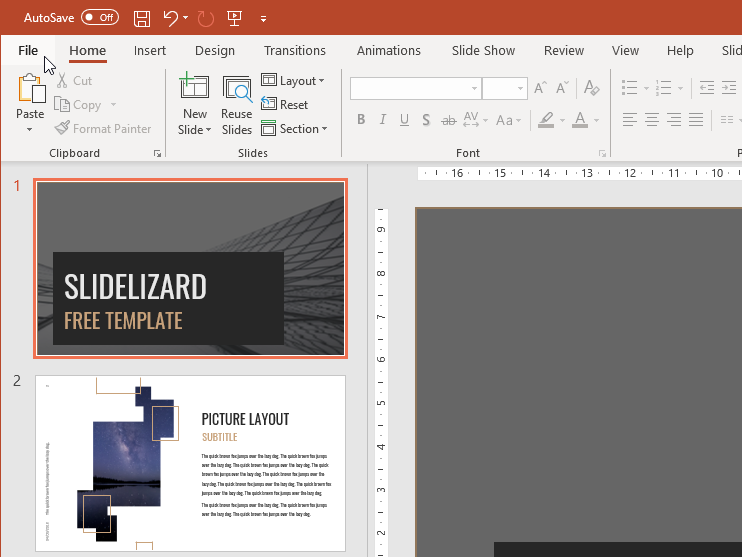
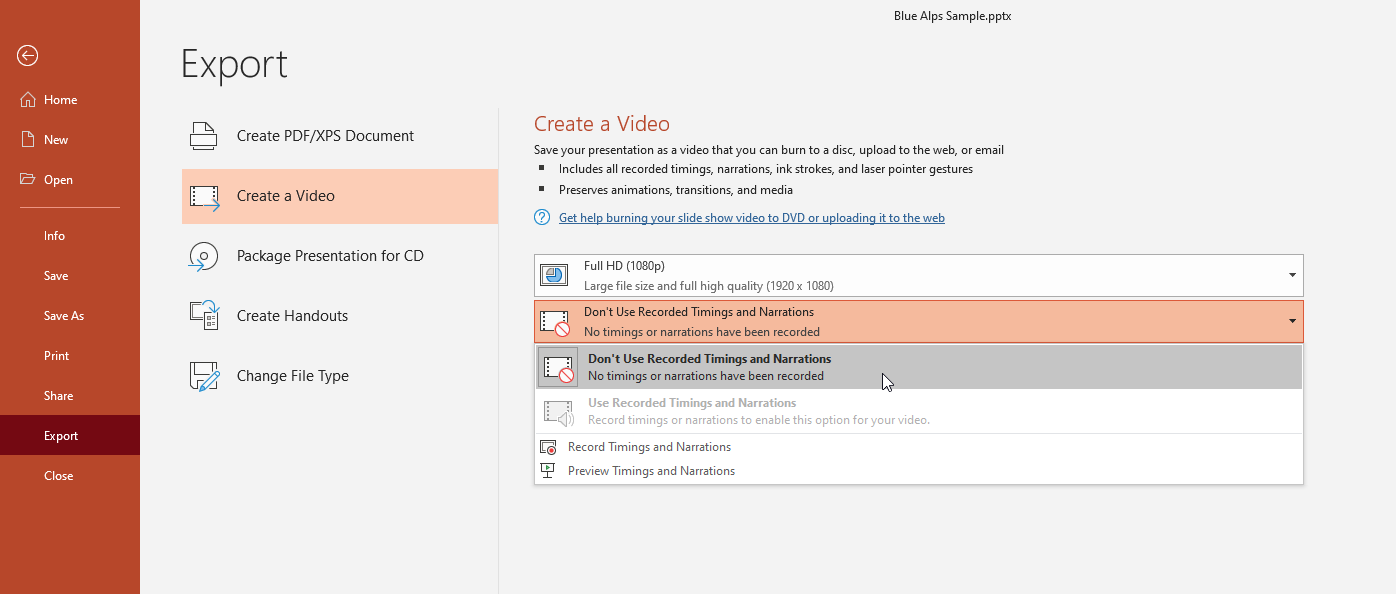
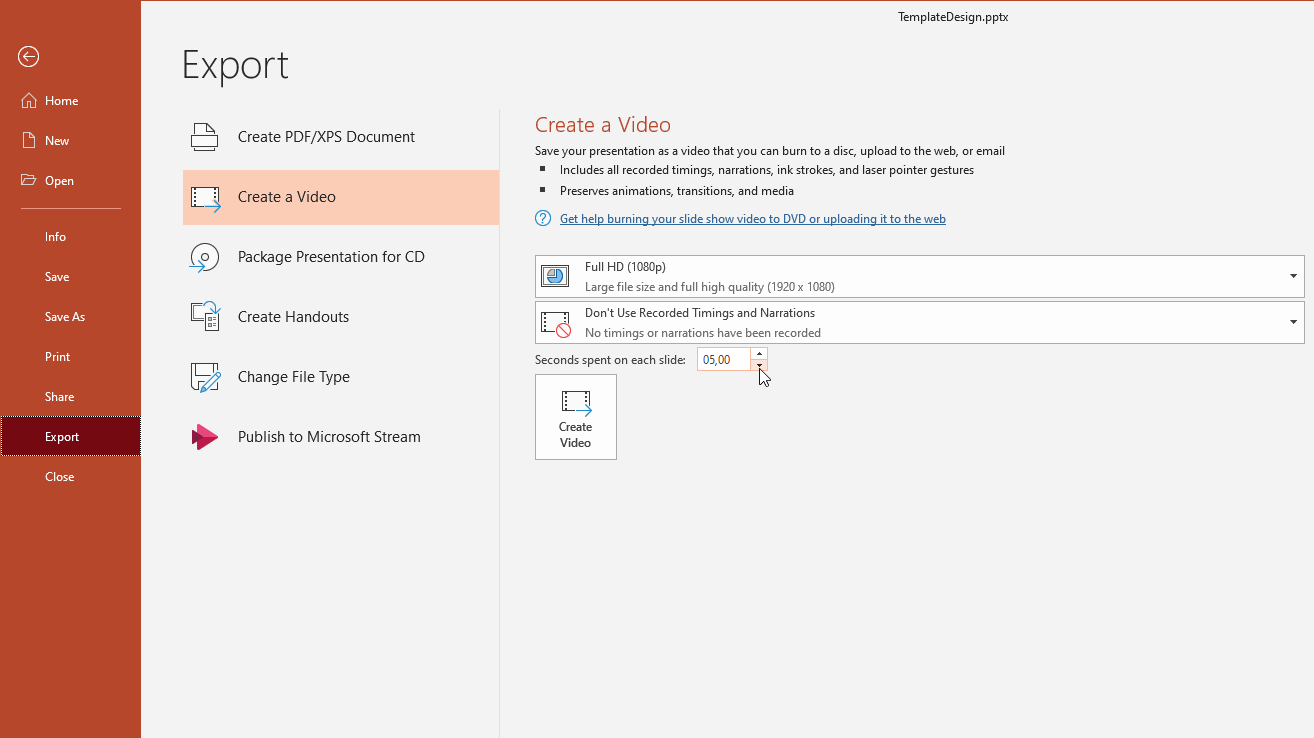
- Click on File and go to Export.
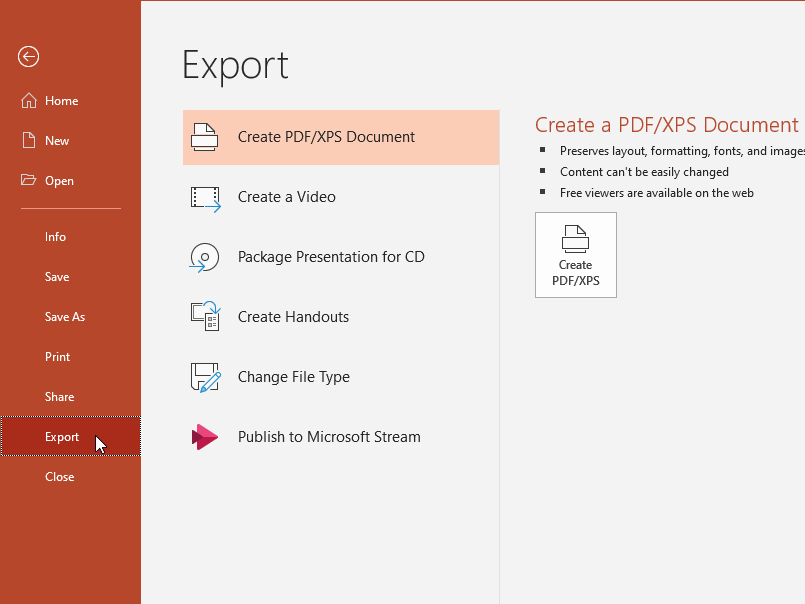
- Then you select Create a video, still in the File tab.
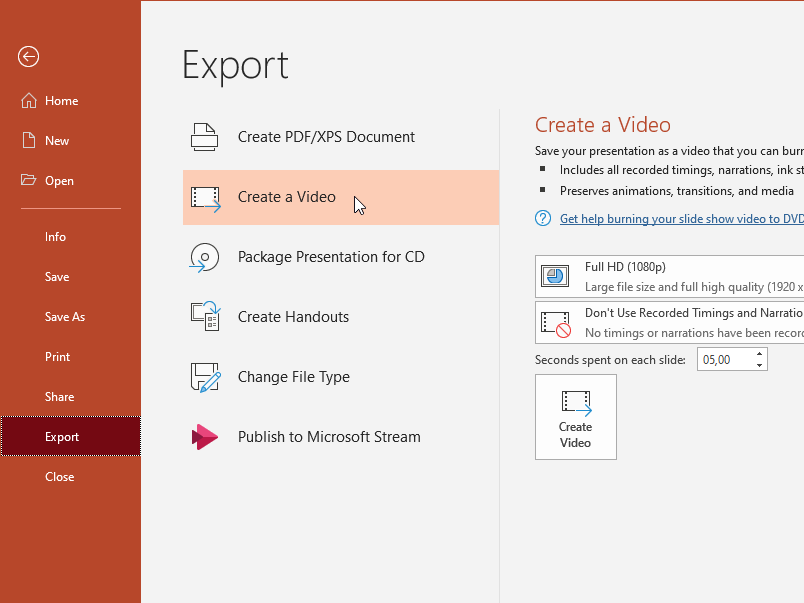
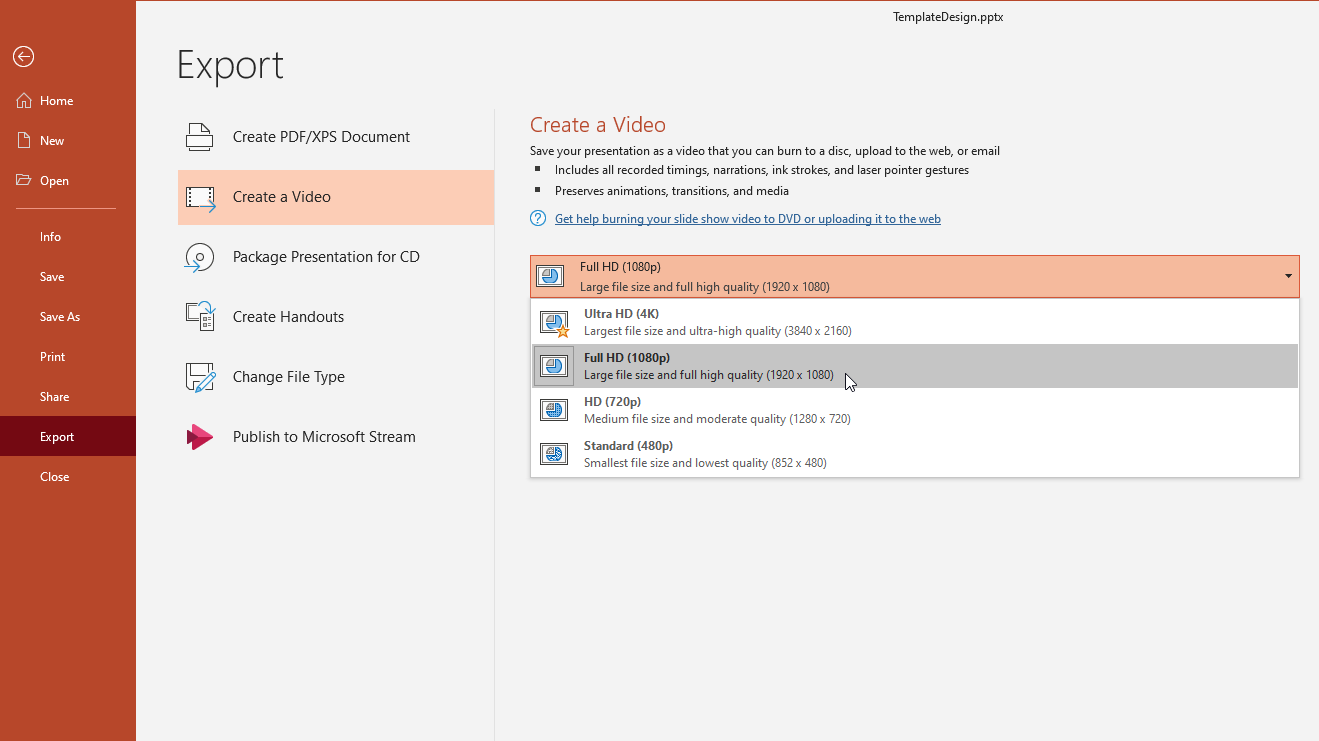
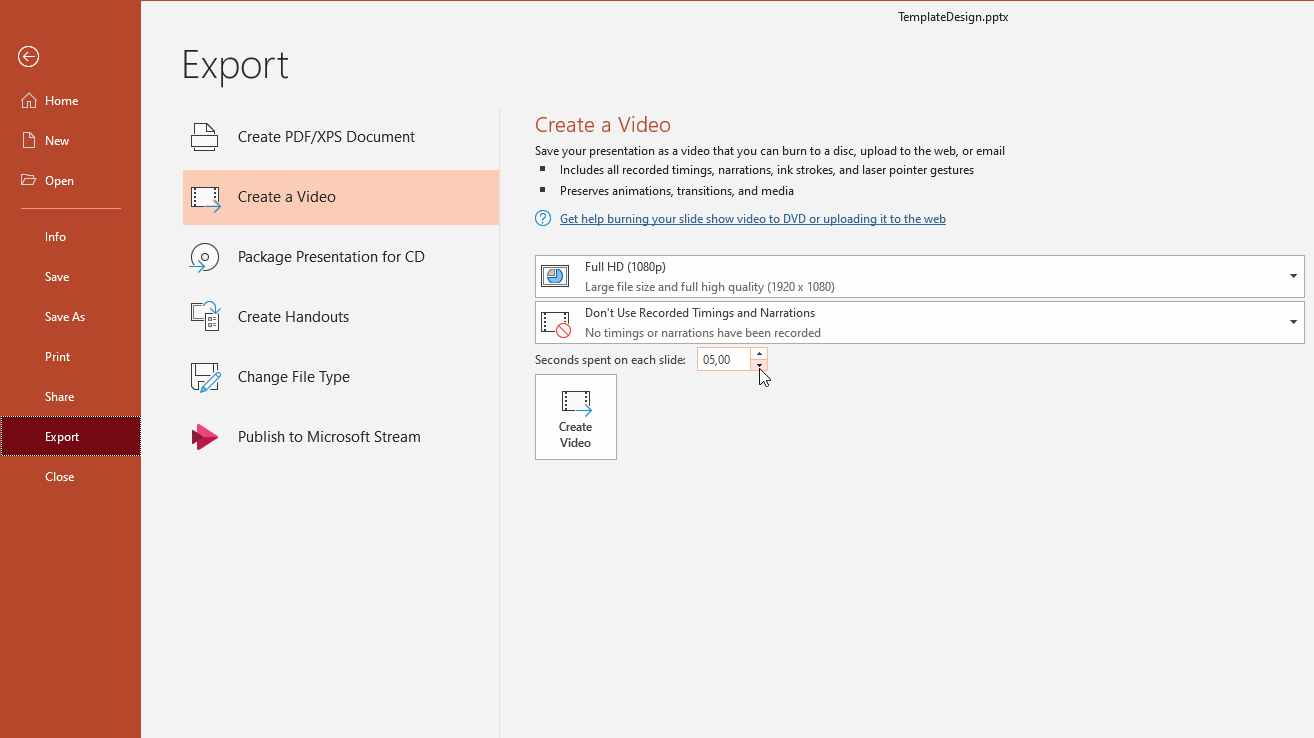
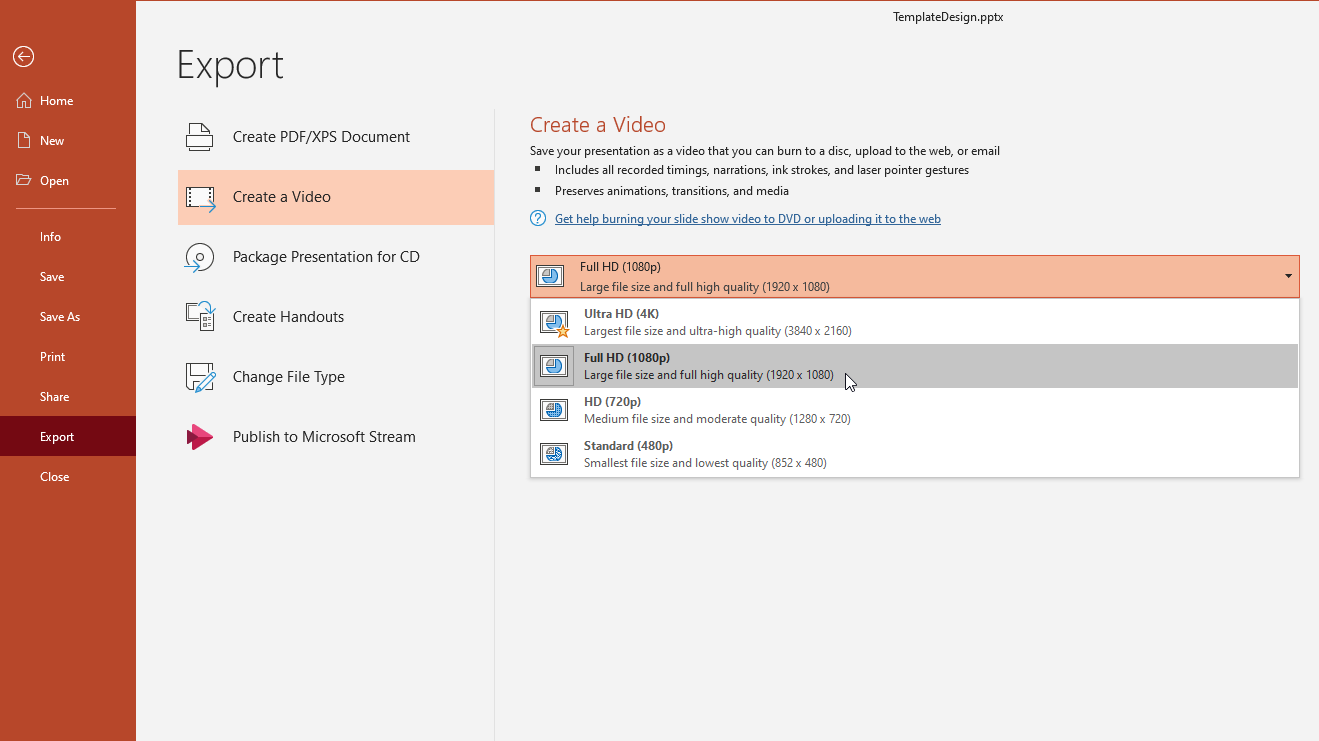
- Click on the first drop-down-menu and pick the quality you prefer - usually Full HD.
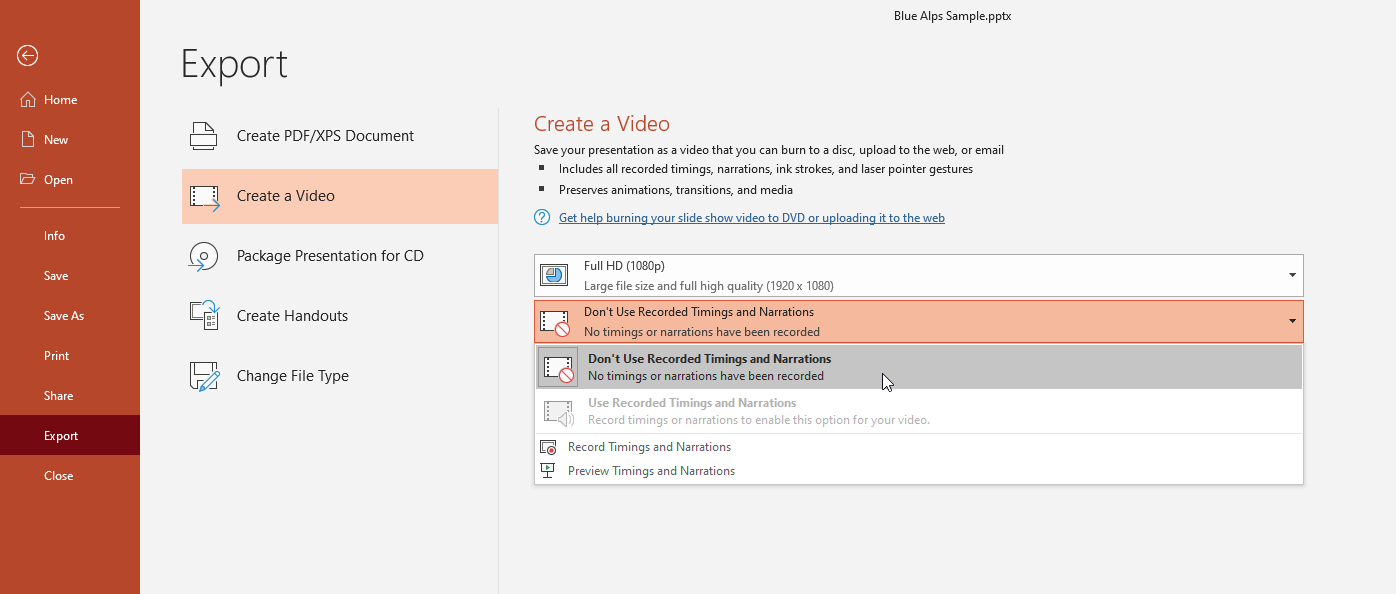
- In the second drop-down-menu below you can set if recorded timings or narrations are included in the video.
- Select the duration of the slides e.g. 5 sec and then select Create video.
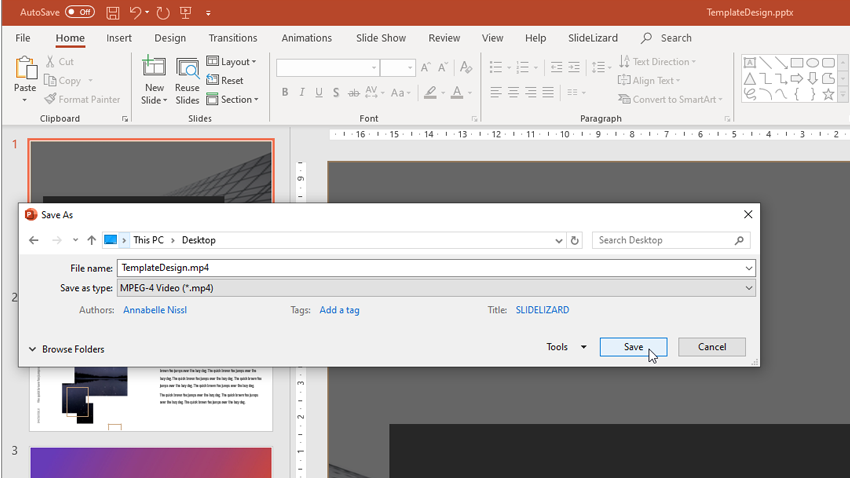
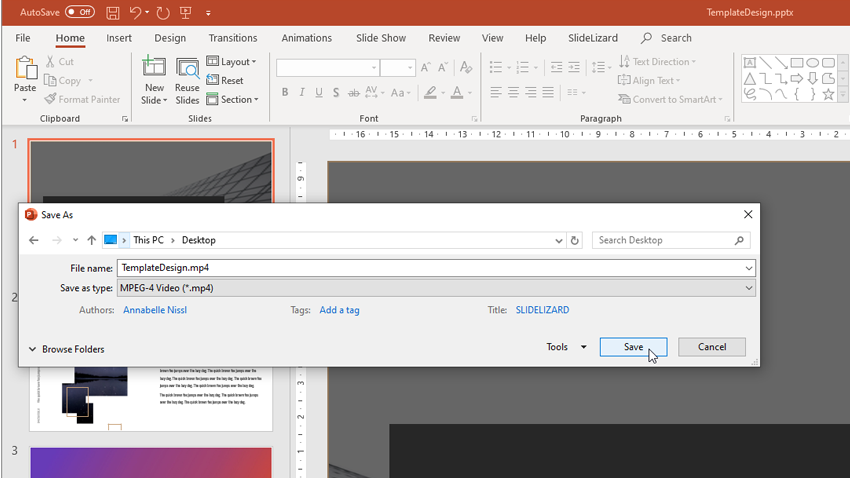
- In the last step set the storage location and a file name and your PowerPoint is saved as a mp4 video file!
Custom slide timings
If you select this option, it is possible to determine your own the duration of the slides or add some extras.
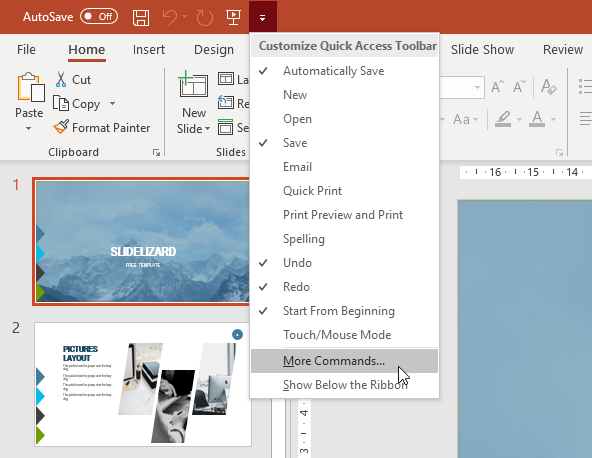
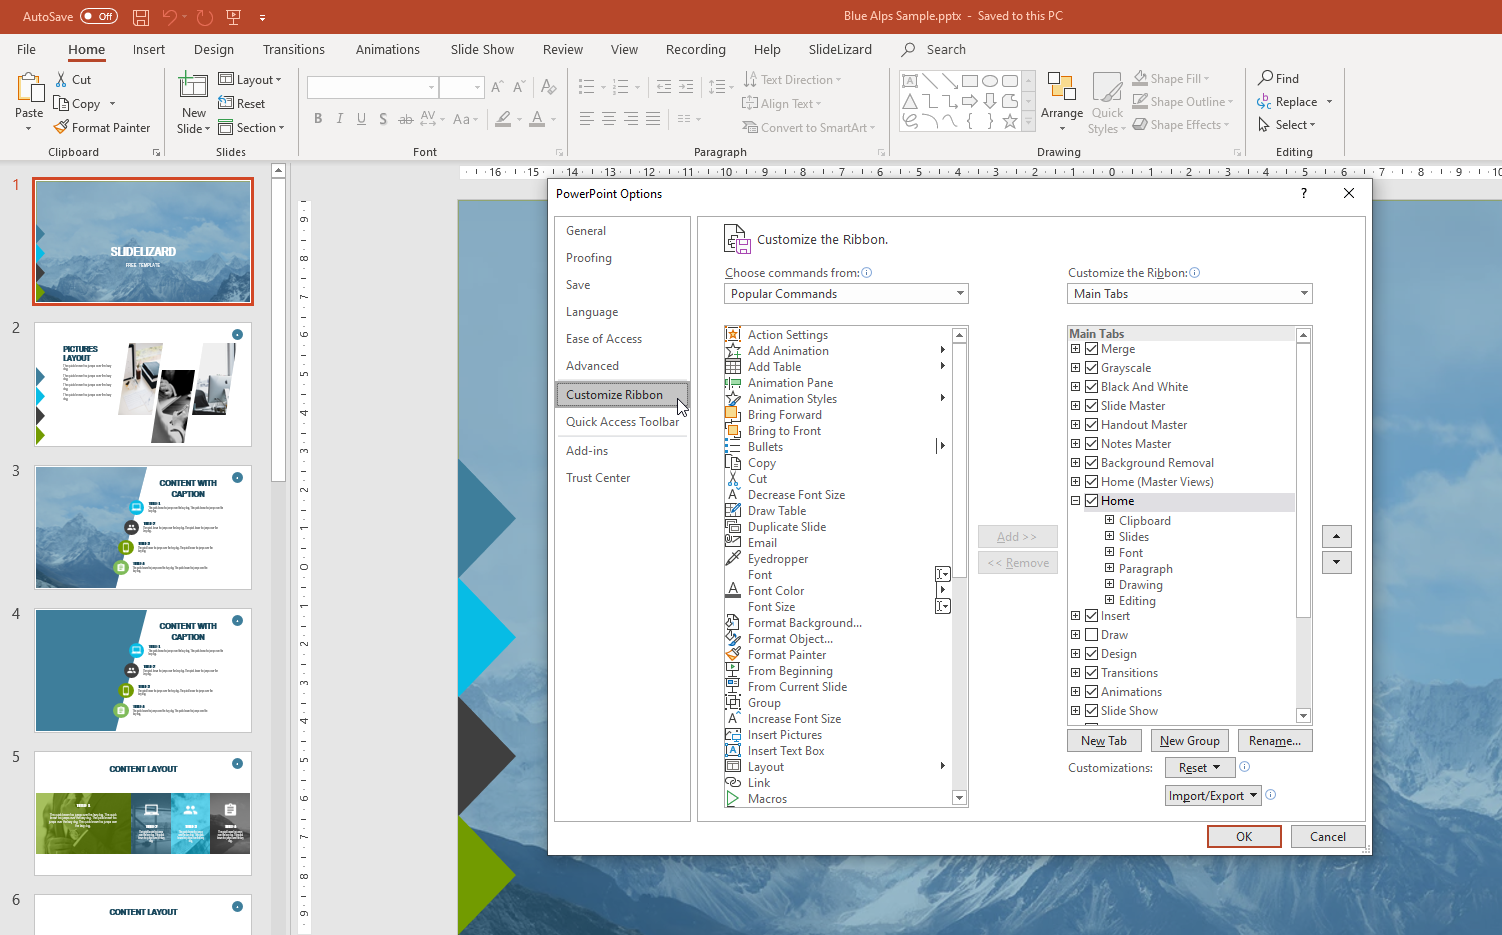
- Click on the drop-down-menu and select the penultimate option called More commands.
- Click on Customize Ribbon, one above the current option.
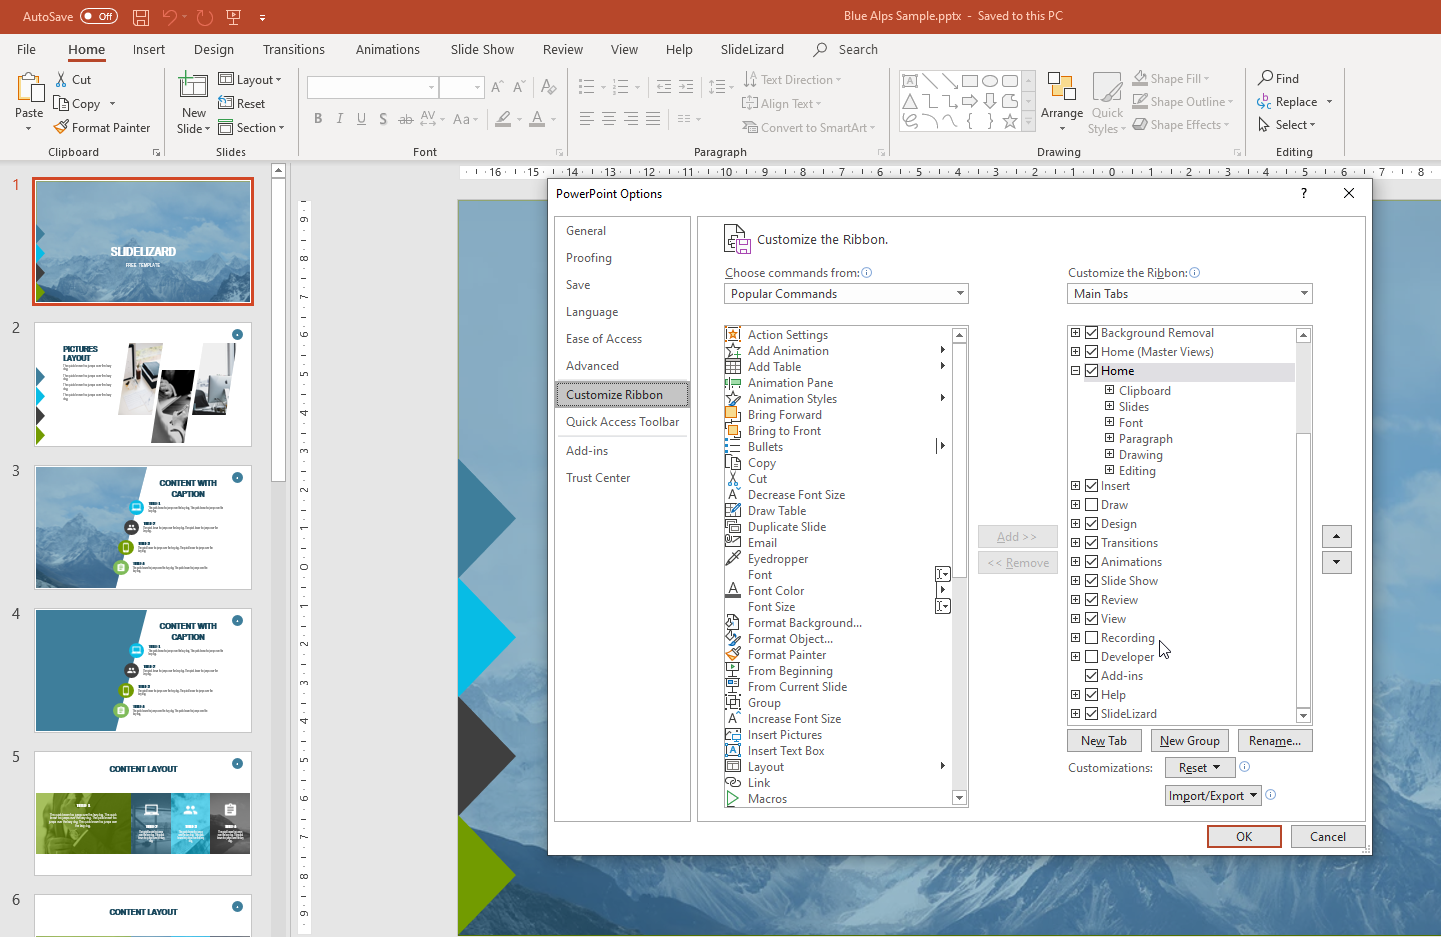
- Go to the right windowYou and scroll down a little bit. There is the option Recording, which is the one you need to select. Go to Ok in order to confirm your setting.
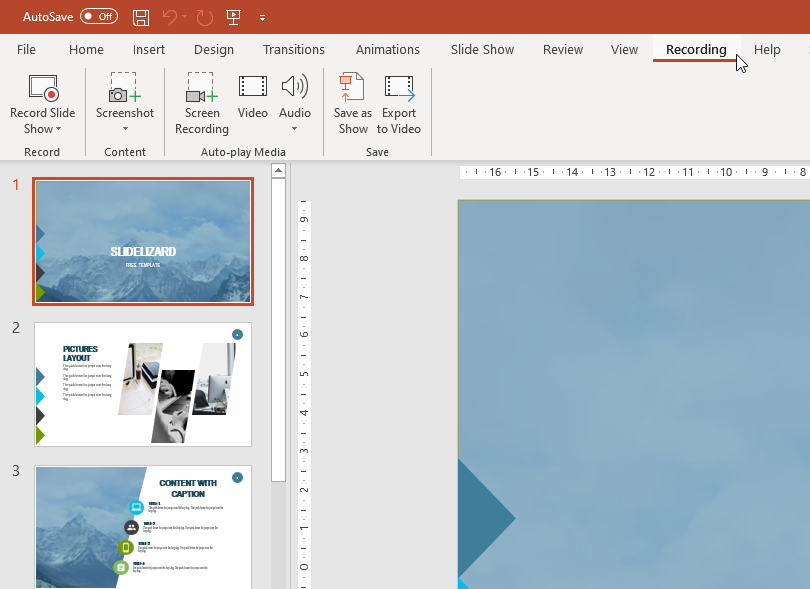
- Now there is a new tab between View and Help with some handy functions you can quickly reach if you need them often.
- Here are some simple functions you can set for yourself, like if the video starts at the beginning or from the current slide or you can also insert audio or videos files and more handy stuff.
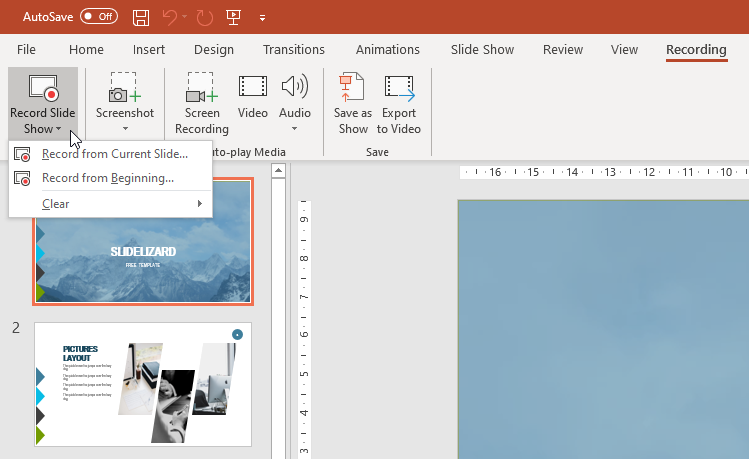
- But the special things there is, that you can customize your timings of the slides. That means there are not fix timings for each slide, just click through the slides while recording. So you have an individual tempo, you can draw sketches or determine if notes you have already written get displayed or not. If you choose in the Record Slide Show menu Record from Current Slide or the other option Record from Beginning has just one little difference.
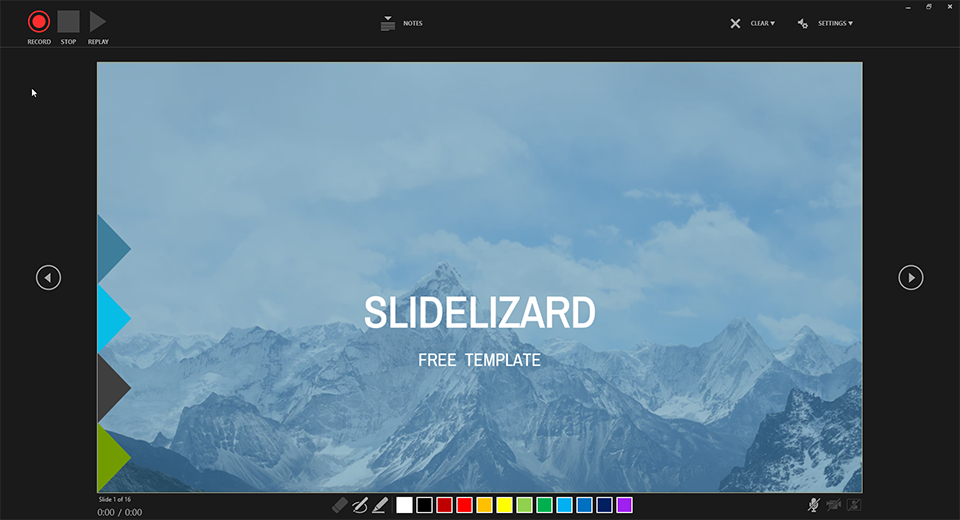
A window will open, similar to the presenter view and you can click through your slides at your own pace and also add sketches or markers. Basically, this option is like screen recording. In the bottom bar you'll find two drawing tools with different thickness, different colors are available and also a camera with sound, so you can comment your slides for example. In the upper bar you start the recording and can also pause it if necessary. It is also possible to show or hide already written notes of a slide. With the settings on the far right you can set the camera or sound recording. In case your are unhappy with your recording of a slide - no problem at all, just remove it and try it again! If you are done, just stop the recording and export your video.
Now to the peculiar topic: How to convert my presentation into a video?
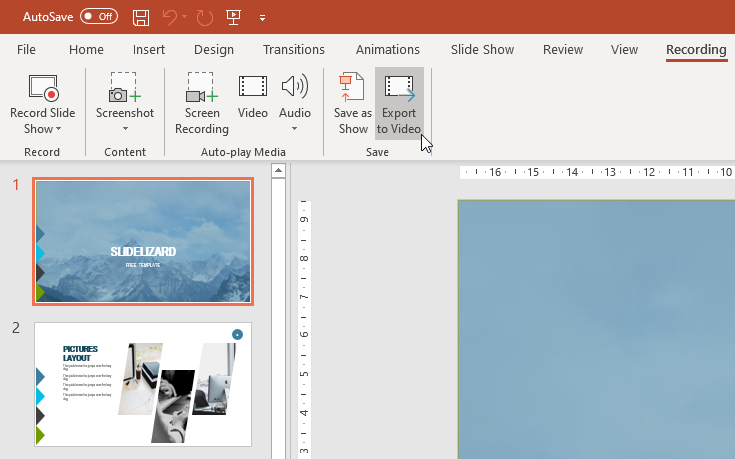
- If your are happy with your settings, go to Export to Video
- Click on the first drop-down-menu and pick the quality you prefer - usually Full HD.
- In the second drop-down-menu below you can set if recorded timings or narrations are included in the video.
- Select the duration of the slides, e.g. 5 sec.
- In the last step klick on create video and set the storage location and a file name for your video and your PowerPoint is saved as a video!
Useful Keyboard Shortcuts
| Shortcut | Action |
|---|---|
| CTRL+C | Copy an element or text |
| CTRL+V | Paste a previously copied element or text |
| CTRL+Z | Undo an action |
| CTRL+Y | Redo an action |
| CTRL+S | Save |
FAQ
How can I export a PowerPoint presentation as a video?
If you want to export your PowerPoint as a video, first go to "File" and then to "Export". Then click on "Create a Video". You can now pick the quality you prefer and set a display duration for slides. You can read a more detailed instruction and how to export slides with custom slide timings here.


