With the help of a table of contents, your audience will know right at the beginning what you specialize in during your presentation. With PowerPoint, creating such tables of contents is no longer a big effort. In our blog post, we show you various ways of creating one. Afterwards, we also have a template for you with the most different ways you can design your tables of contents.
-
Table of contents
Automatically generating a table of contents in PowerPoint
To do this, you need to open your finished PowerPoint presentation and create a new slide at the point where you want to have the table of contents. Next, you need to switch to "Outline view" in the "View" tab. Now you should see the headings and subheadings of the slides on the left side.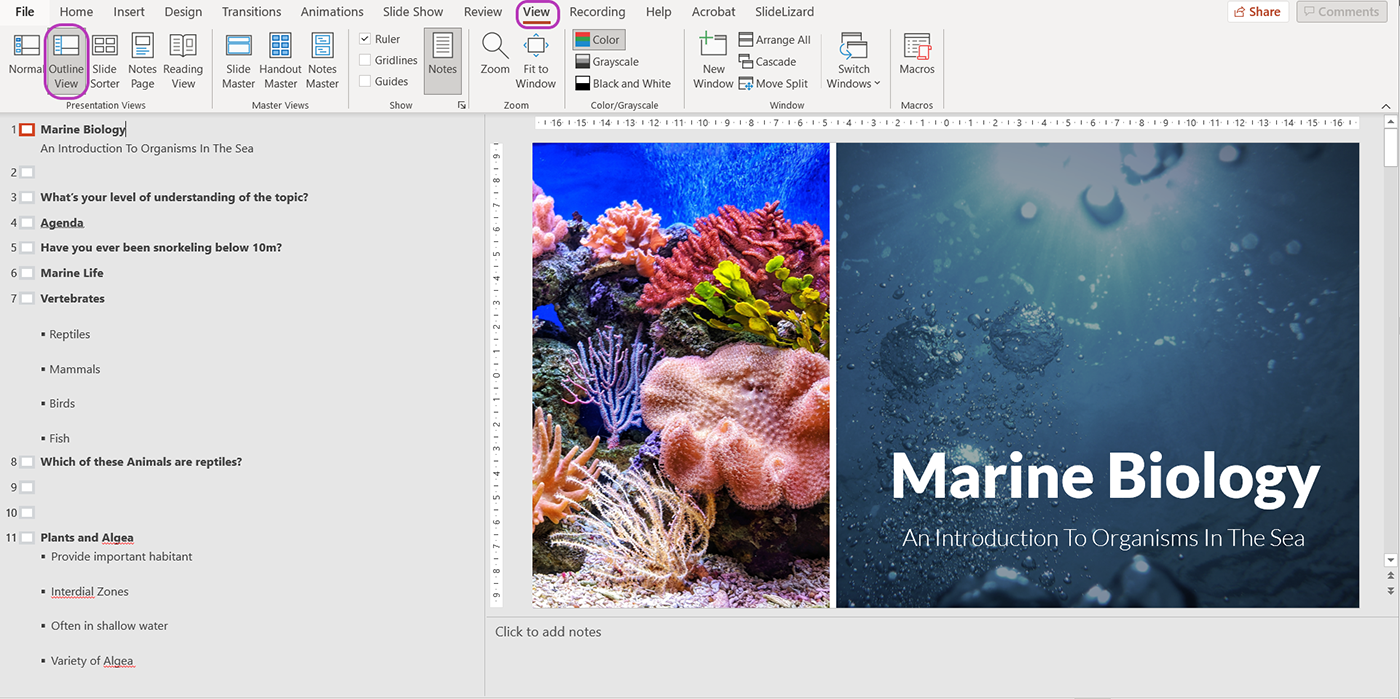
Right click in the left side and find "Collapse" and select "Collapse All". Now you will only see the headings of the individual slides on the left side.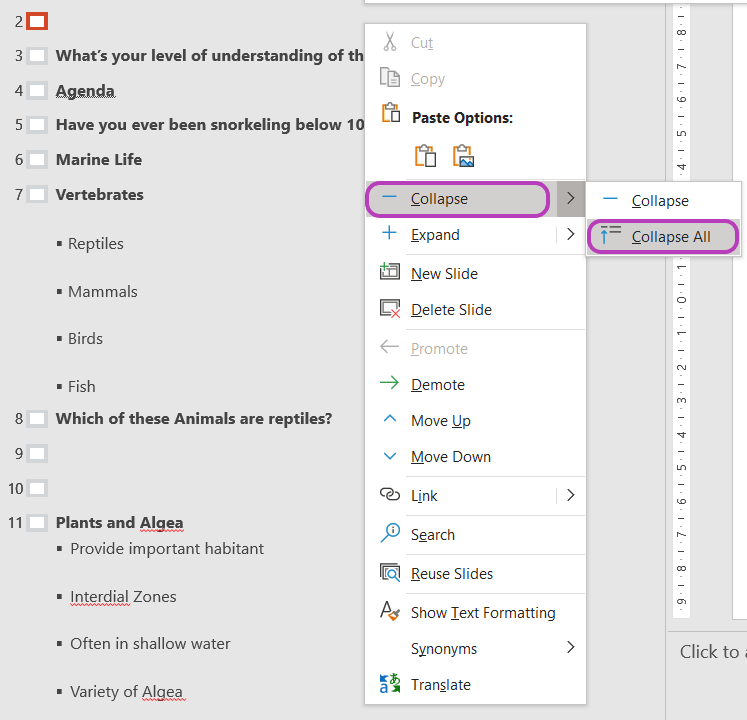
The next step is to select and copy all the headings on the left-hand side. Then switch back to the normal view. To do this, click on "Normal" in the "View" tab.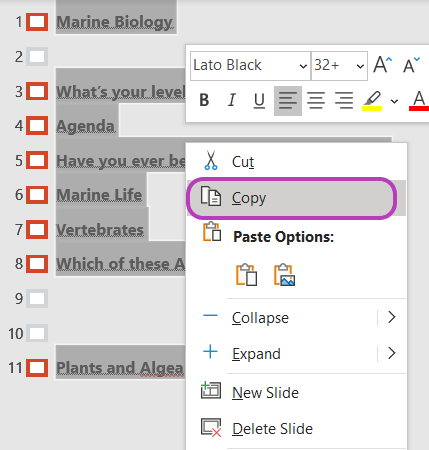
Now select the slide on which you want to insert the table of contents. However, before you can insert your headings, you must create a text field. To do this, go to the "Insert" tab and click on "Text Box". After you have expanded this text field as desired, you can insert your headings there with the help of Ctrl + V.
Manually creating table of contents in PowerPoint
You can also easily design a TOC yourself and manually enter the topics. To do this, insert a new slide and a text field. You will find the "Text field" option in the "Insert" tab and can drag it on your slide as desired. Now you can manually enter your headings into the text field. Finally, you can either design your table of contents using the SmartArt graphics, or you can use one of our templates, which you can download for free.
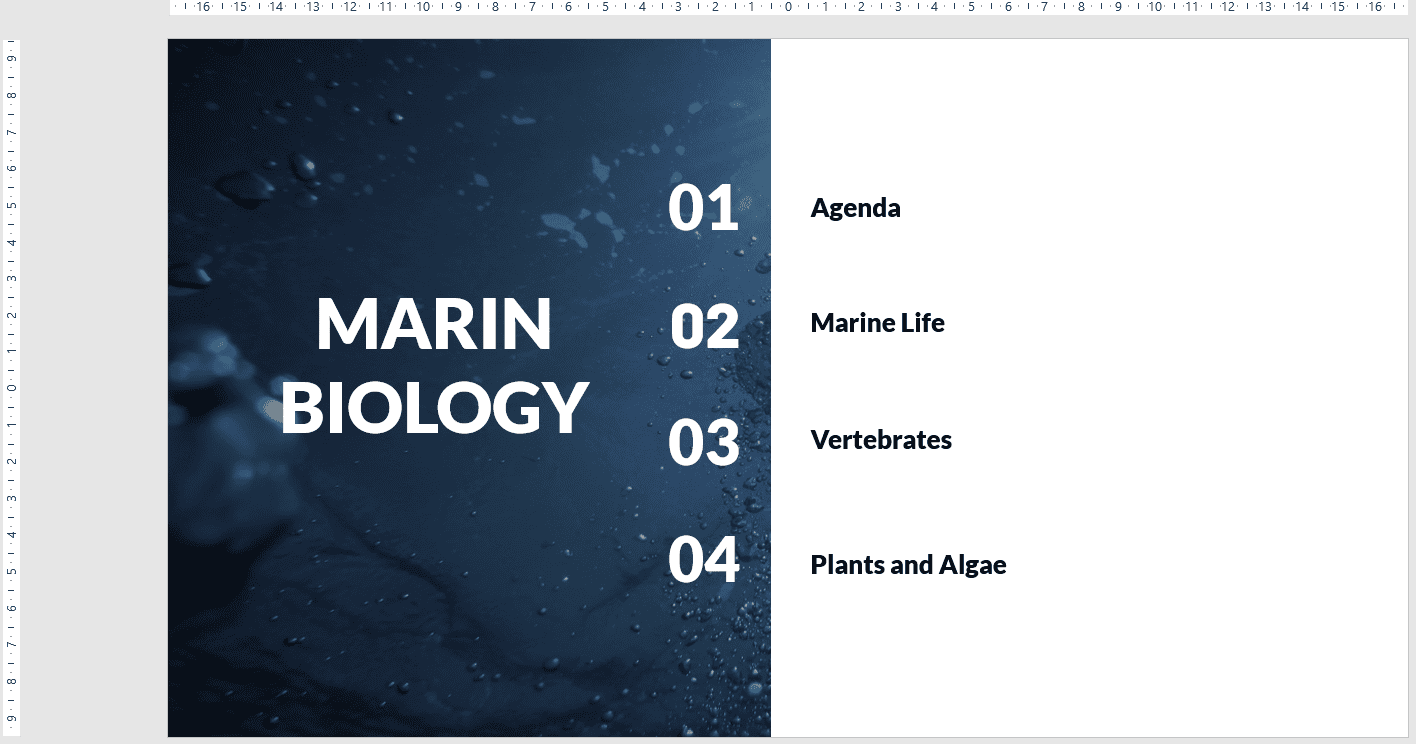

Linking the table of contents with links
In order to be able to add links to the various headings in your table of contents, you must have already created one. Then go to the table of contents and select the heading that you want to link to the corresponding slide of your PowerPoint presentation. Then right-click to open the context menu and select "Link".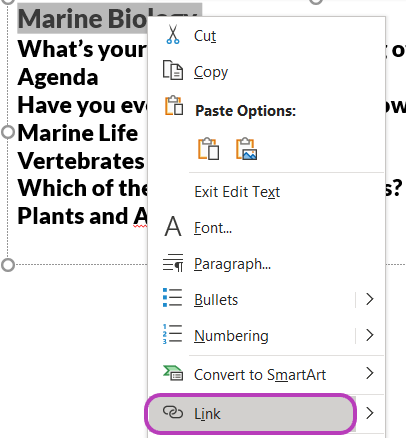
A new dialogue box opens where you select the option "current document" on the left-hand side. Then you only have to click on the slide you want to link, and you can confirm your entry with "Ok".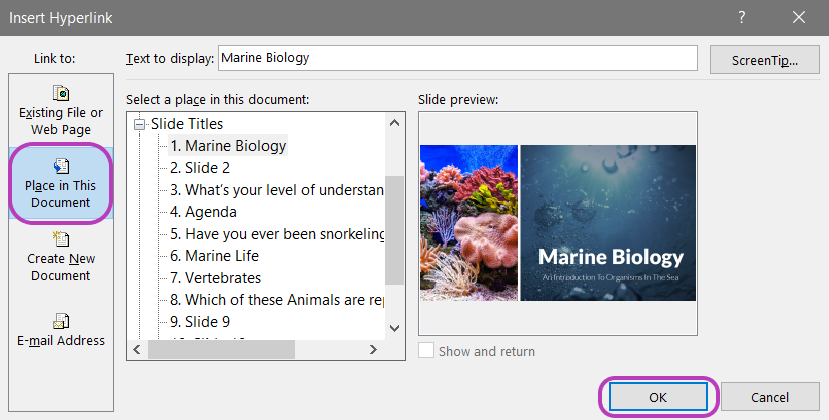
Improve the design with SmartArts
For this, you should have already created a table of contents as above. Next, click in the table of contents and select all the text. Now click on "Convert to Smart SmartArt" in the "Paragraph" group on the "Home" tab. There you can now choose different templates which will refresh your table of contents.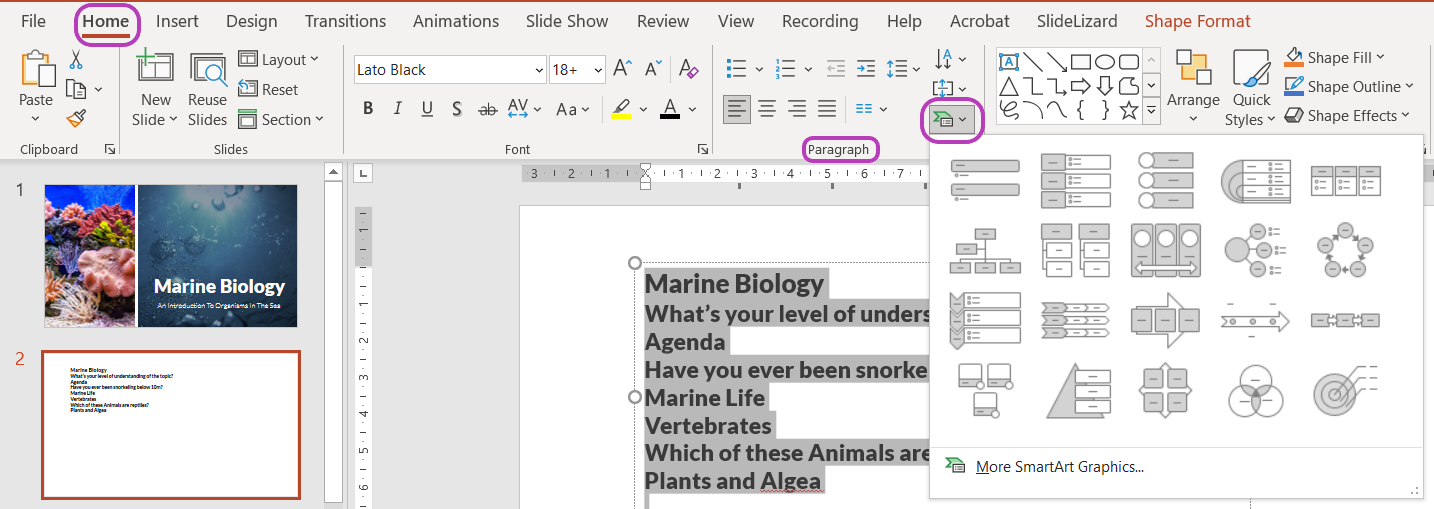
Download free Table of Contents Template
