Today, we are getting into a powerful PowerPoint feature that can save you and your co-workers lots of time. Maybe you are already using them, but since almost 70% of PowerPoint users do not, and if you are one of them you are about to learn some important things. Whether you already know about templates or you’ve never heard of them – we are going to teach you everything you need to know and show you the steps to create your own one.
Contents
What is a template and why should I use it?
- A PowerPoint template is a kind of pattern that is predefined for a presentation. It gives a frame for the content and the design of your slides.
- Elements like background, colours, titles, etc. are set beforehand.
- You can save the template separately and reuse it for as many presentations as you need.
- As all the designs and slides have already been defined, you only need to add your custom text and pictures. That saves a lot of time.
- Templates are especially perfect for companies. Make one template that fits the corporate design and any employee can use them from now on, saving time and giving your business a consistent and professional appearance.
Now, learn how to create a template by watching our video or reading the steps below.
Video
The slide master
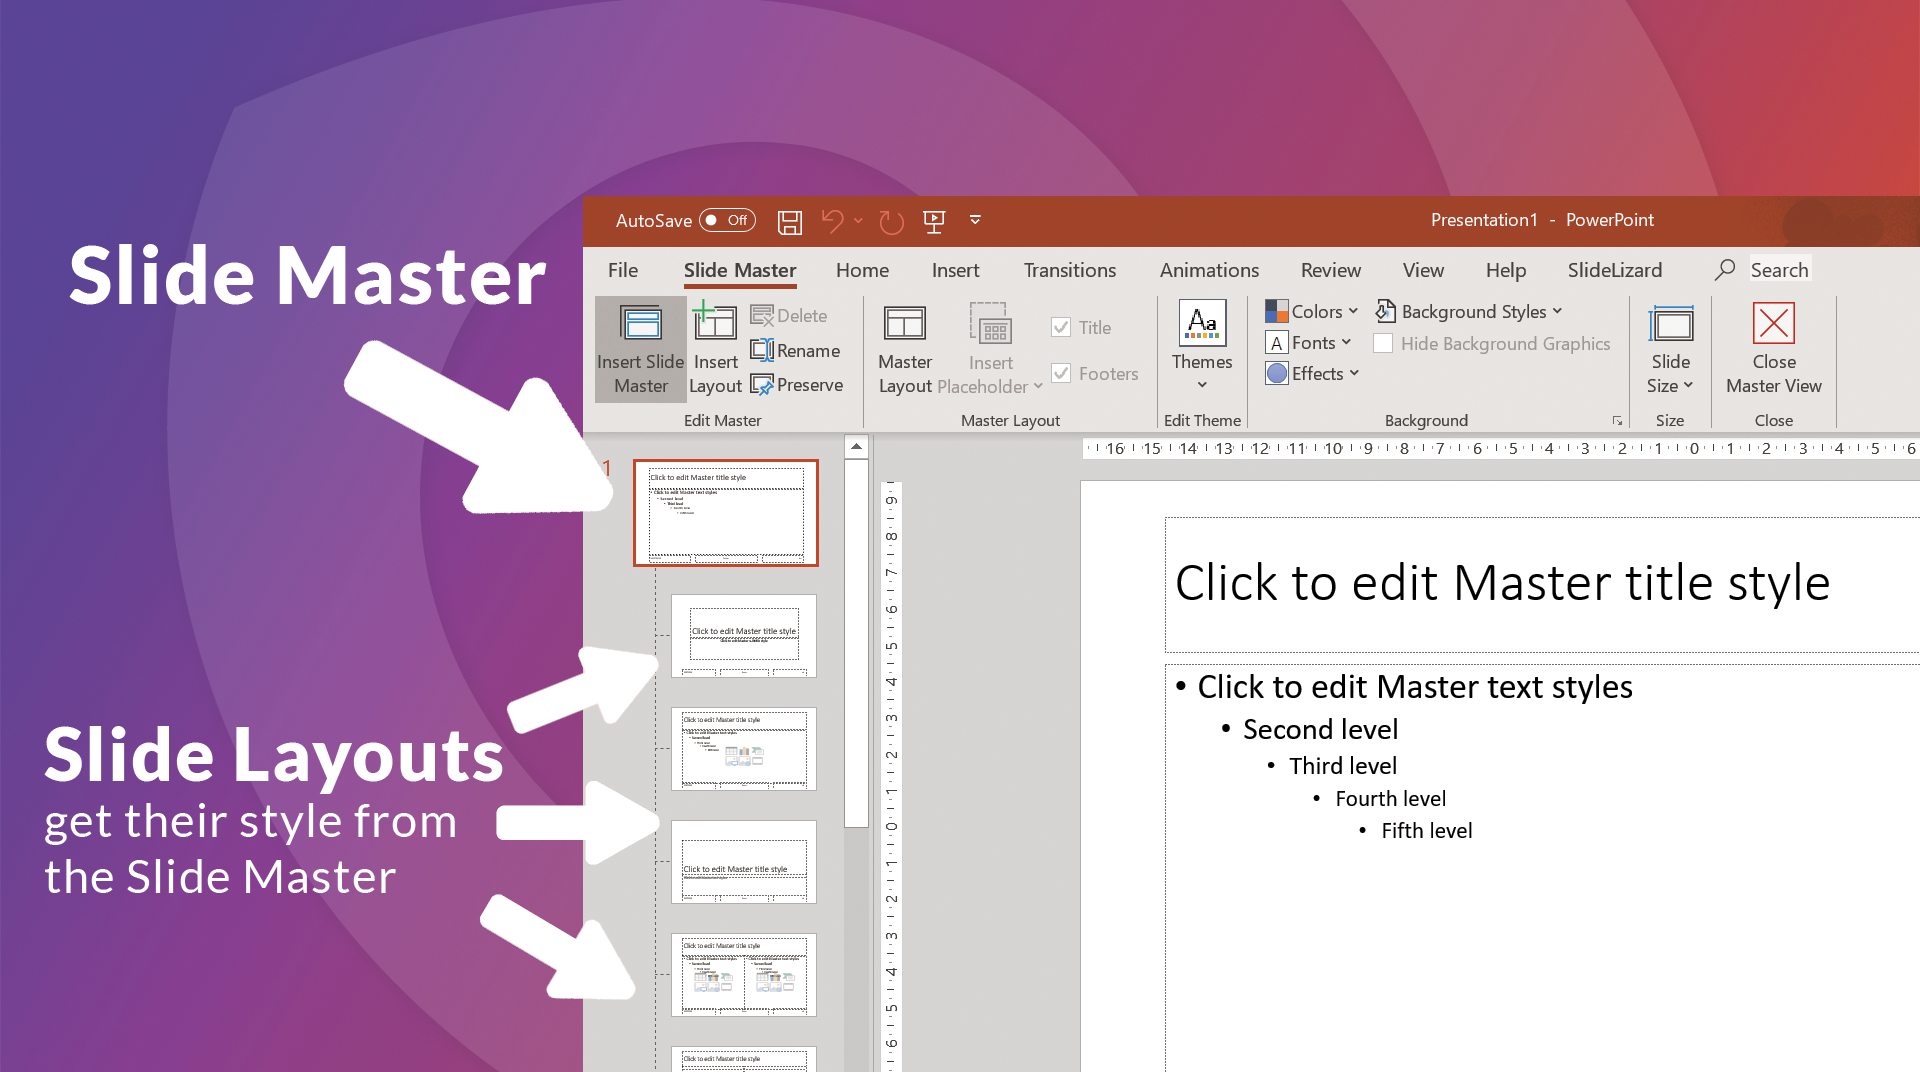
The Slide Master is the most important tool for creating templates. You can find it by clicking View in the PowerPoint menu (and then clicking on Slide Master).

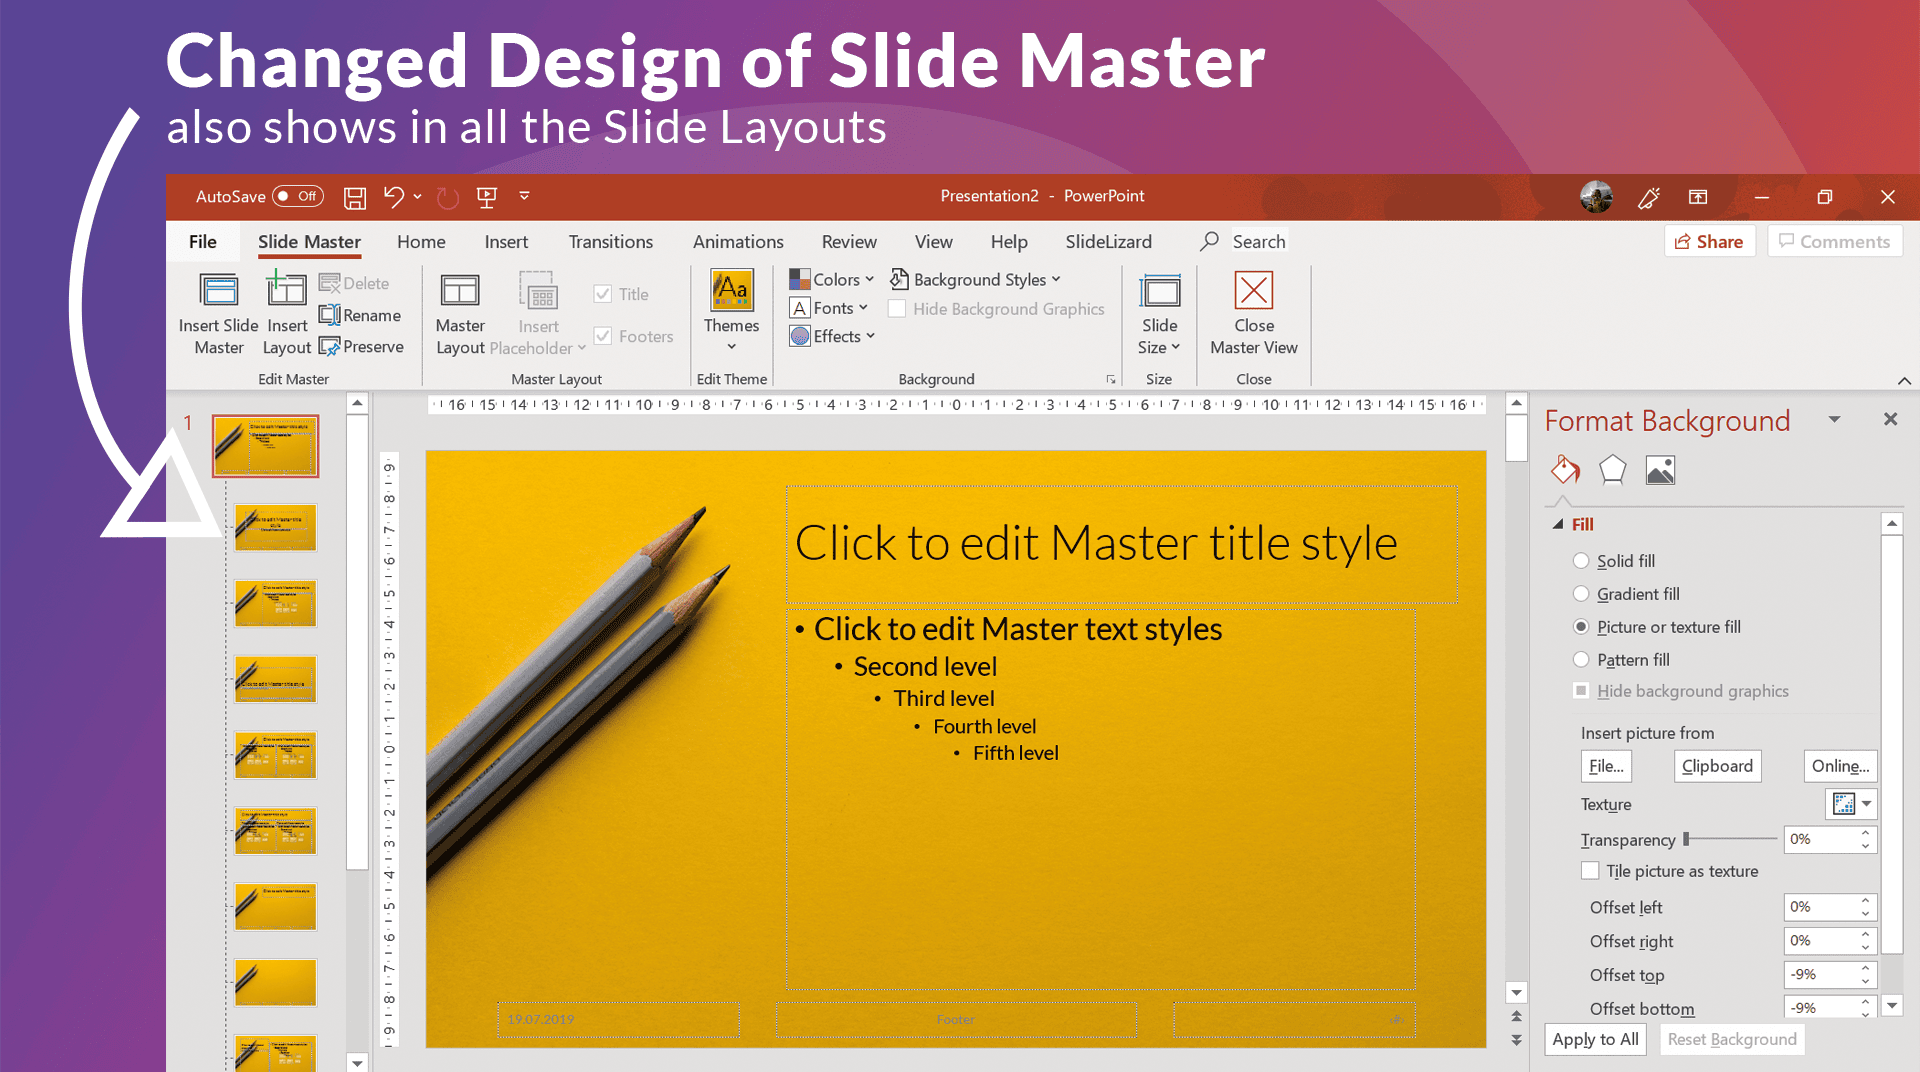
In the window on the left you will find a couple of slides that do not (yet) have a design. Also, you will see one slide on top that is slightly larger and connected to the other slides with dashed lines. That one is your Slide Master, your “main slide”. Everything you change there will directly affect all the other slides. You can try it out by setting a different background colour for the Slide Master. The other slides will immediately change colours, too.
Edit slide masters more precisely
We use the main slide to pre-set all our important elements. Once we like how it looks, we can go ahead and adjust each individual slide-template. Here’s a list of things you can/should change:
- Colours: Go to Colours and choose either one of PowerPoint’s predefined palettes or create your own one.
- Fonts: Click Fonts and then Customise Fonts and choose styles for your titles and regular text.
- Background: Go as crazy-creative or minimalistic as you want. Change the background colour, maybe add some shapes, or look for a nice image online that works behind your text. (To do so, right click on your main slide and go to “Format Background”)
- Title: Change the size, style and placement of the title, simply by editing it as you would usually do.
- Text Style: Do the same for your regular text boxes. Define what the bullet points should look like.
- Footer: You can switch the footer elements around, replace them and change them like any regular text.
Using themes
While themes in PowerPoint are similar to templates, they are not the same thing. A theme in PowerPoint is a predefined selection of colors, fonts, effects and backgrounds. So if you are creating a template for your company we recommend you to add a custom theme with the company's brand colors and fonts. Now, if you want to know in more detail what a theme design is in PowerPoint and how to create one, you can read about it in more detail in our blog post, Theme Designs.

Use the right fonts
A very important point with PowerPoint presentations is to choose the right font, because it must be easy to read, but it should also not be boring. In our blog post on the best fonts for your presentations, we have picked some good fonts for you to use.
Advance image design in templates
A cool effect for a template is to crop images to a custom shape so they are not shown as boring rectangles. To achieve this, first insert an image placeholder in the slide master (go to Insert placeholder and click on Picture). 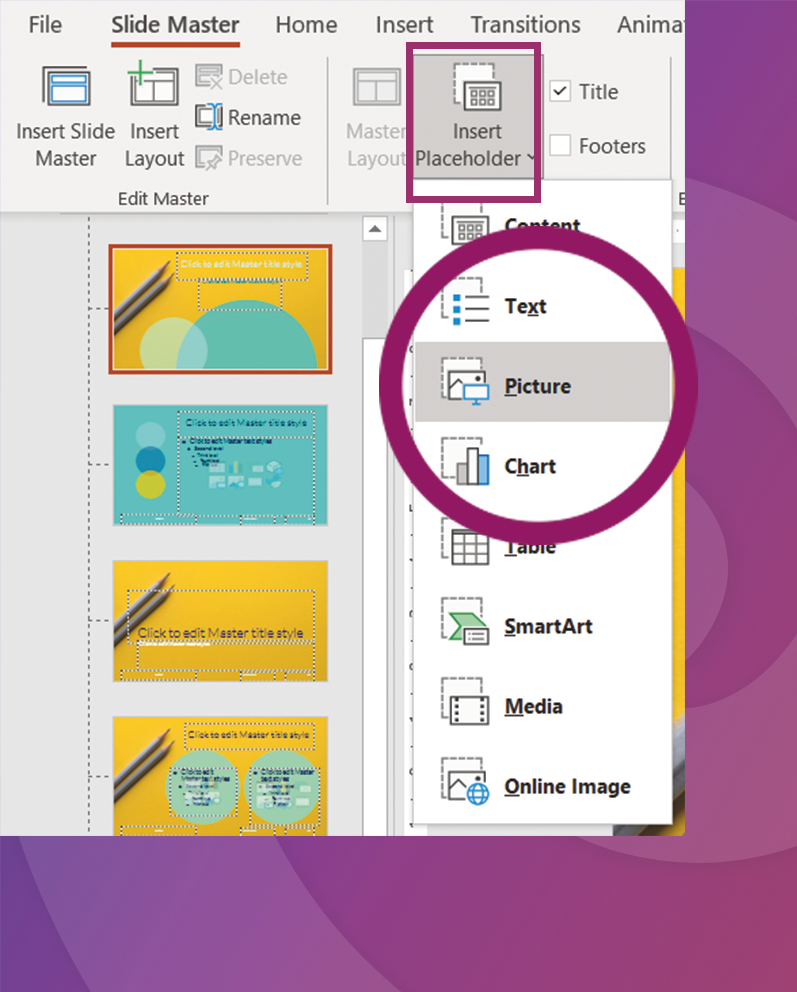
Next, you need to insert the desired shape on top of the image. You can either insert your own SVG image or use one of the default PowerPoint shapes. Then you have to select both (image placeholder and shape) and click Convert to shape under Graphic format.Now, in the Shape Format tab click on "Merge shapes" and then choose "Intersect". Now your image is automatically cropped to your shape. See our blog post, cropping images and pasting them into shapes, for more on the topic, as well as step-by-step instructions.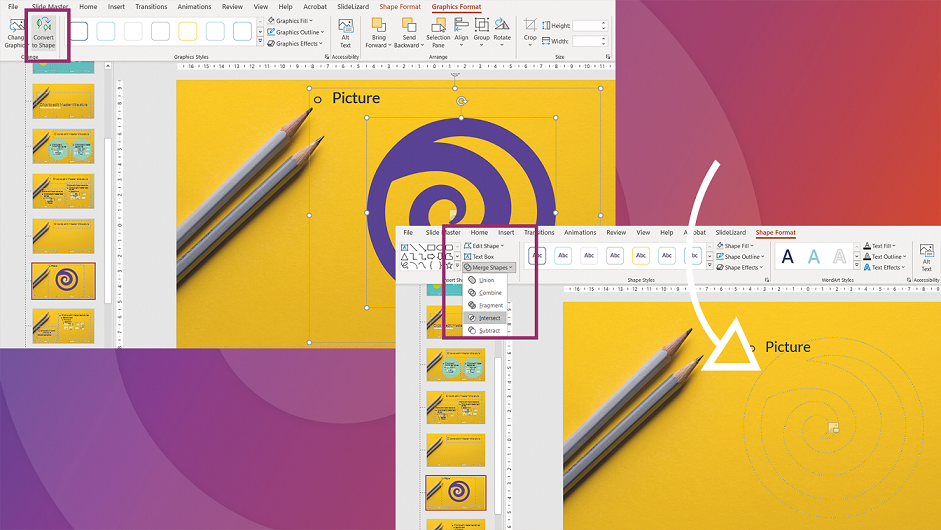
Rename master slides
If you want to give each slide a specific name (it will be shown in the layout chooser), you can easily rename it in the slide master. To do this, right-click on the slide and select Rename layout. You can then rename the PowerPoint slide. 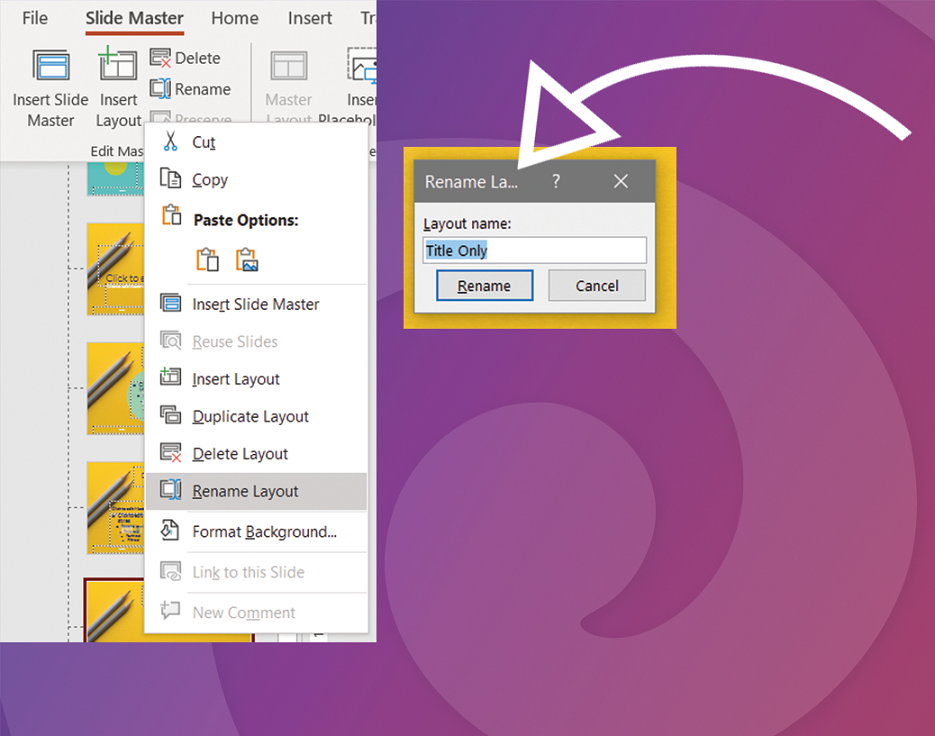
Individual Templates for each slide layout
Once you are finished with your main slide, you can go ahead and adjust the other slide layouts. You may find that some look perfect already – you can leave them as they are. For those who don’t, or if you would just like some different slide designs in your template, here are some useful tips on what you can change:
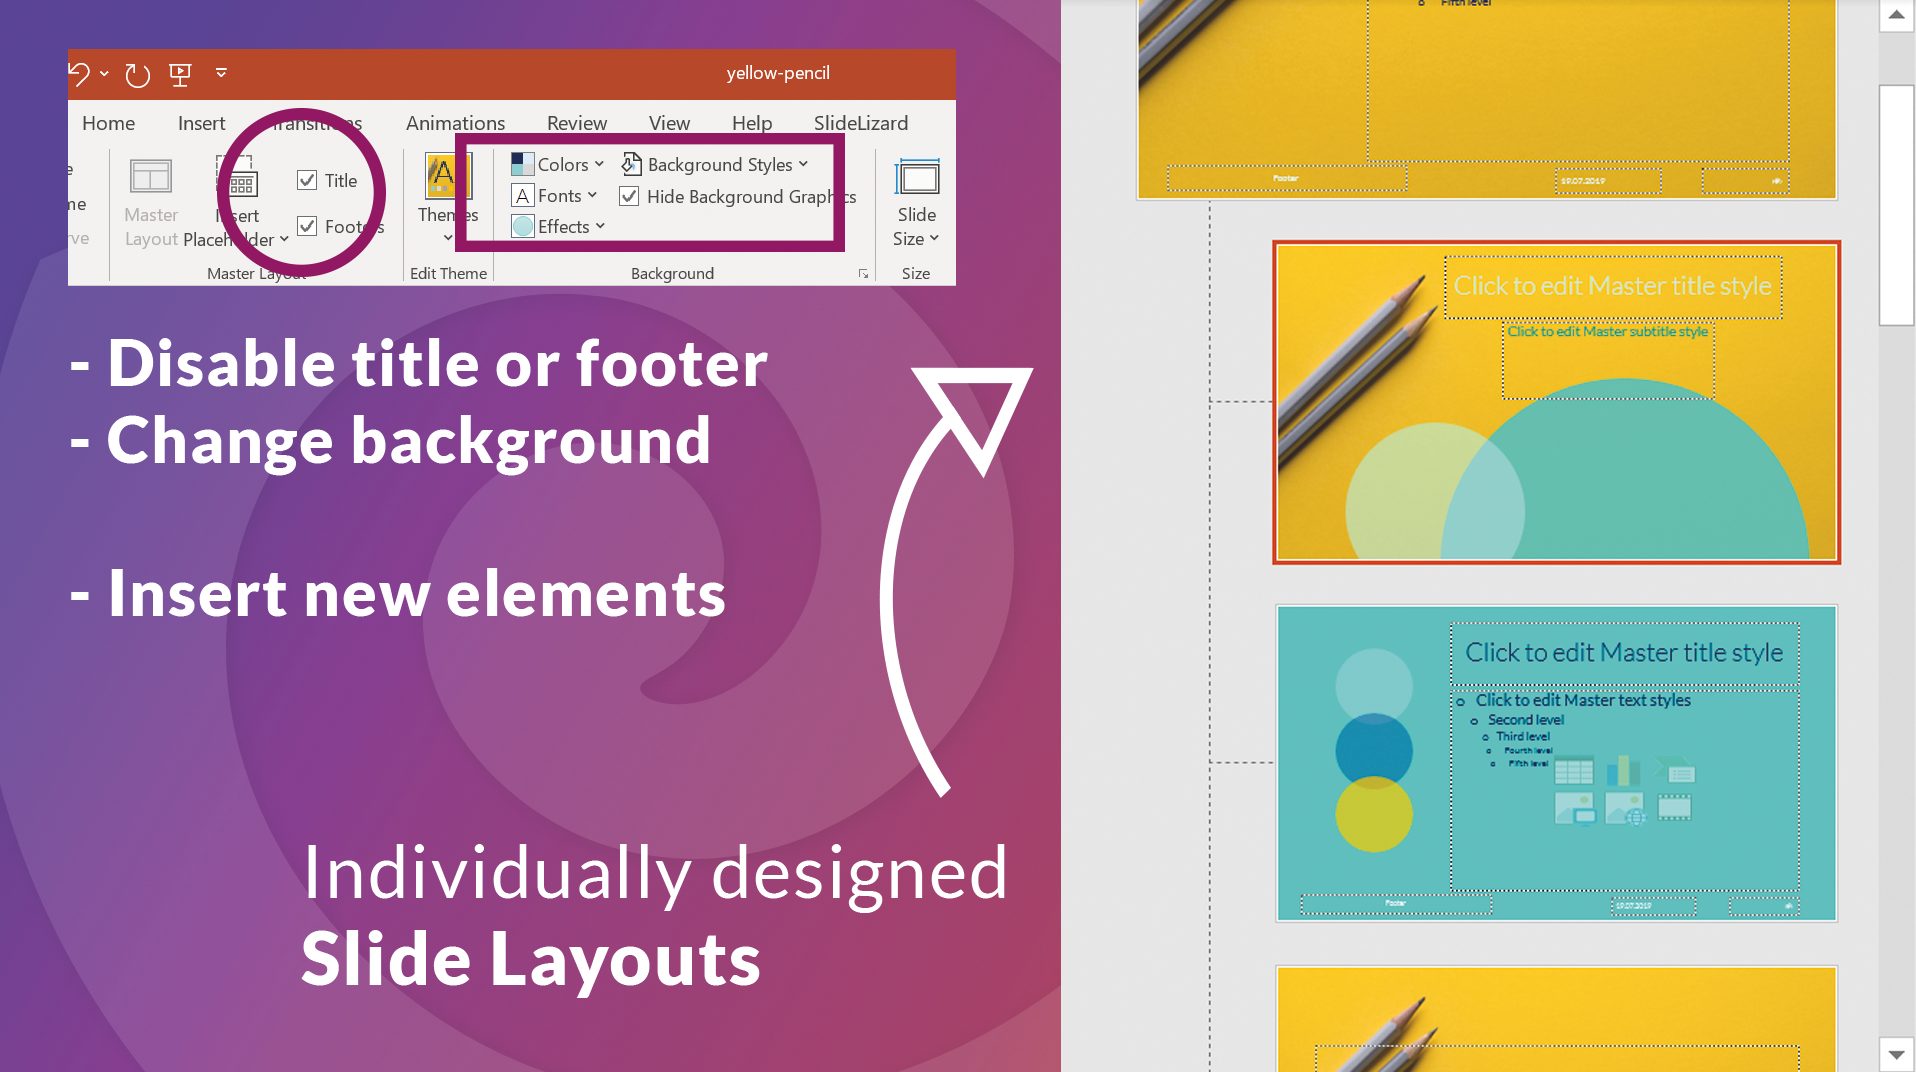
- Background: You may not want the same background on each slide layout. To turn off the background that has been given to the slide (by setting it in the main slide), just tick off the box Hide background graphics in the top Slide Master menu. You are then free to design the background from scratch.
- Footers: On some slides you might not want the footer to show. Disable the Footers checkbox in the task line to make it disappear.
- Title: The same thing works with the title (the checkbox is right there with the Footers)
- Placeholder: Click on Insert Placeholder. You can choose from a variety of placeholders. They can be very helpful because they predefine where a certain element (e.g. image, video,...) should be placed in the presentation.
- Other elements: Of course, you can move, remove and add any other element or object you might need.

TIP: You might need another predefined layout (e.g. for slides that give an overview, for “Contact us” slides, …) You can easily create a template for that as well by right clicking in the grey box on the left with all your layouts and then clicking Insert Layout. By right clicking on that new layout you can go to Rename Layout and call it some name that makes sense. You can treat it like the rest of the layouts and simply adjust it to your needs.
Save your masterpiece and use it for a presentation
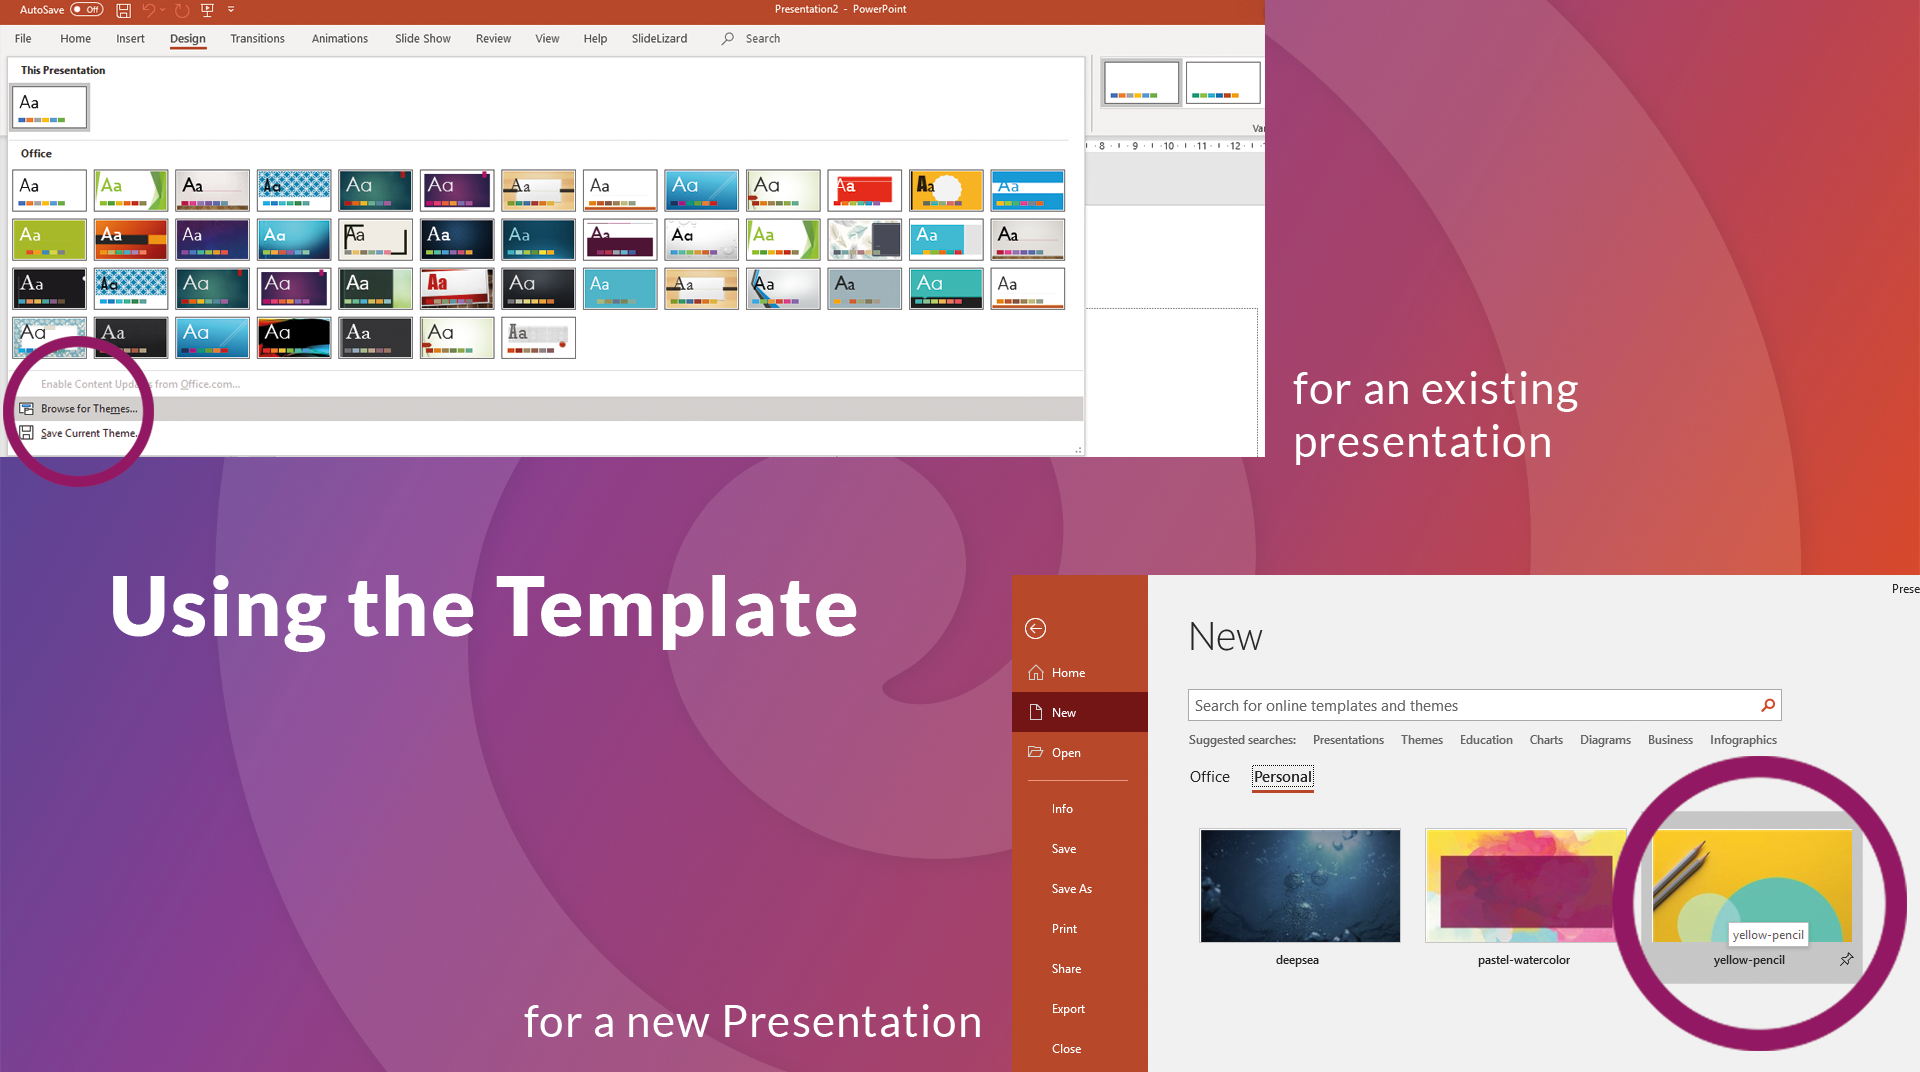
When you are satisfied with the look of all your layouts, you can save the template by clicking File and then Save As. You can now choose any folder or use the folder provided by PowerPoint and then save it as a PowerPoint template (*.potx). Close and open PowerPoint again, click on New in the left orange sidebar and then change from Office to Personal or Custom. Your template should now be visible here. Click on it and you can create a new presentation with your predefined layouts.
You can also set your template as the default option. To do this, you need to click on the pin at the bottom right of the template and pin it to your list.
If for some reason your template was not shown in the start menu OR if you have already created a template-less presentation that should get the template, go to Design at the top of the open presentation, click on the small arrow by the designs and then select Search for designs. There, click on your created template (in the folder where you saved it) and open it. The presentation should now take on your template design.
