We all know the struggle of meticulously designing the slides for our next presentation, giving them an individual touch by using cool custom fonts, just to see that all the work was for nothing because the slides look completely different on the presenting computer. This always happens when the fonts you used for your slides aren't installed, so PowerPoint replaces them with it's default system font. This tutorial works for PowerPoint 2010, 2013, 2016, 2019 and Office 365 on Windows. If you own Microsoft 365 or PowerPoint 2019, there is an even easier way, which is to use cloud fonts.
| Original PowerPoint | Shared PowerPoint |
|---|---|
 |
 |
| Font: Trashed | Font: Arial (substituted) |
| 👍🏻 | 😫 |
Check out the video, or follow the steps below to embed your fonts directly in the PowerPoint (.pptx) file.
Video
Tutorial
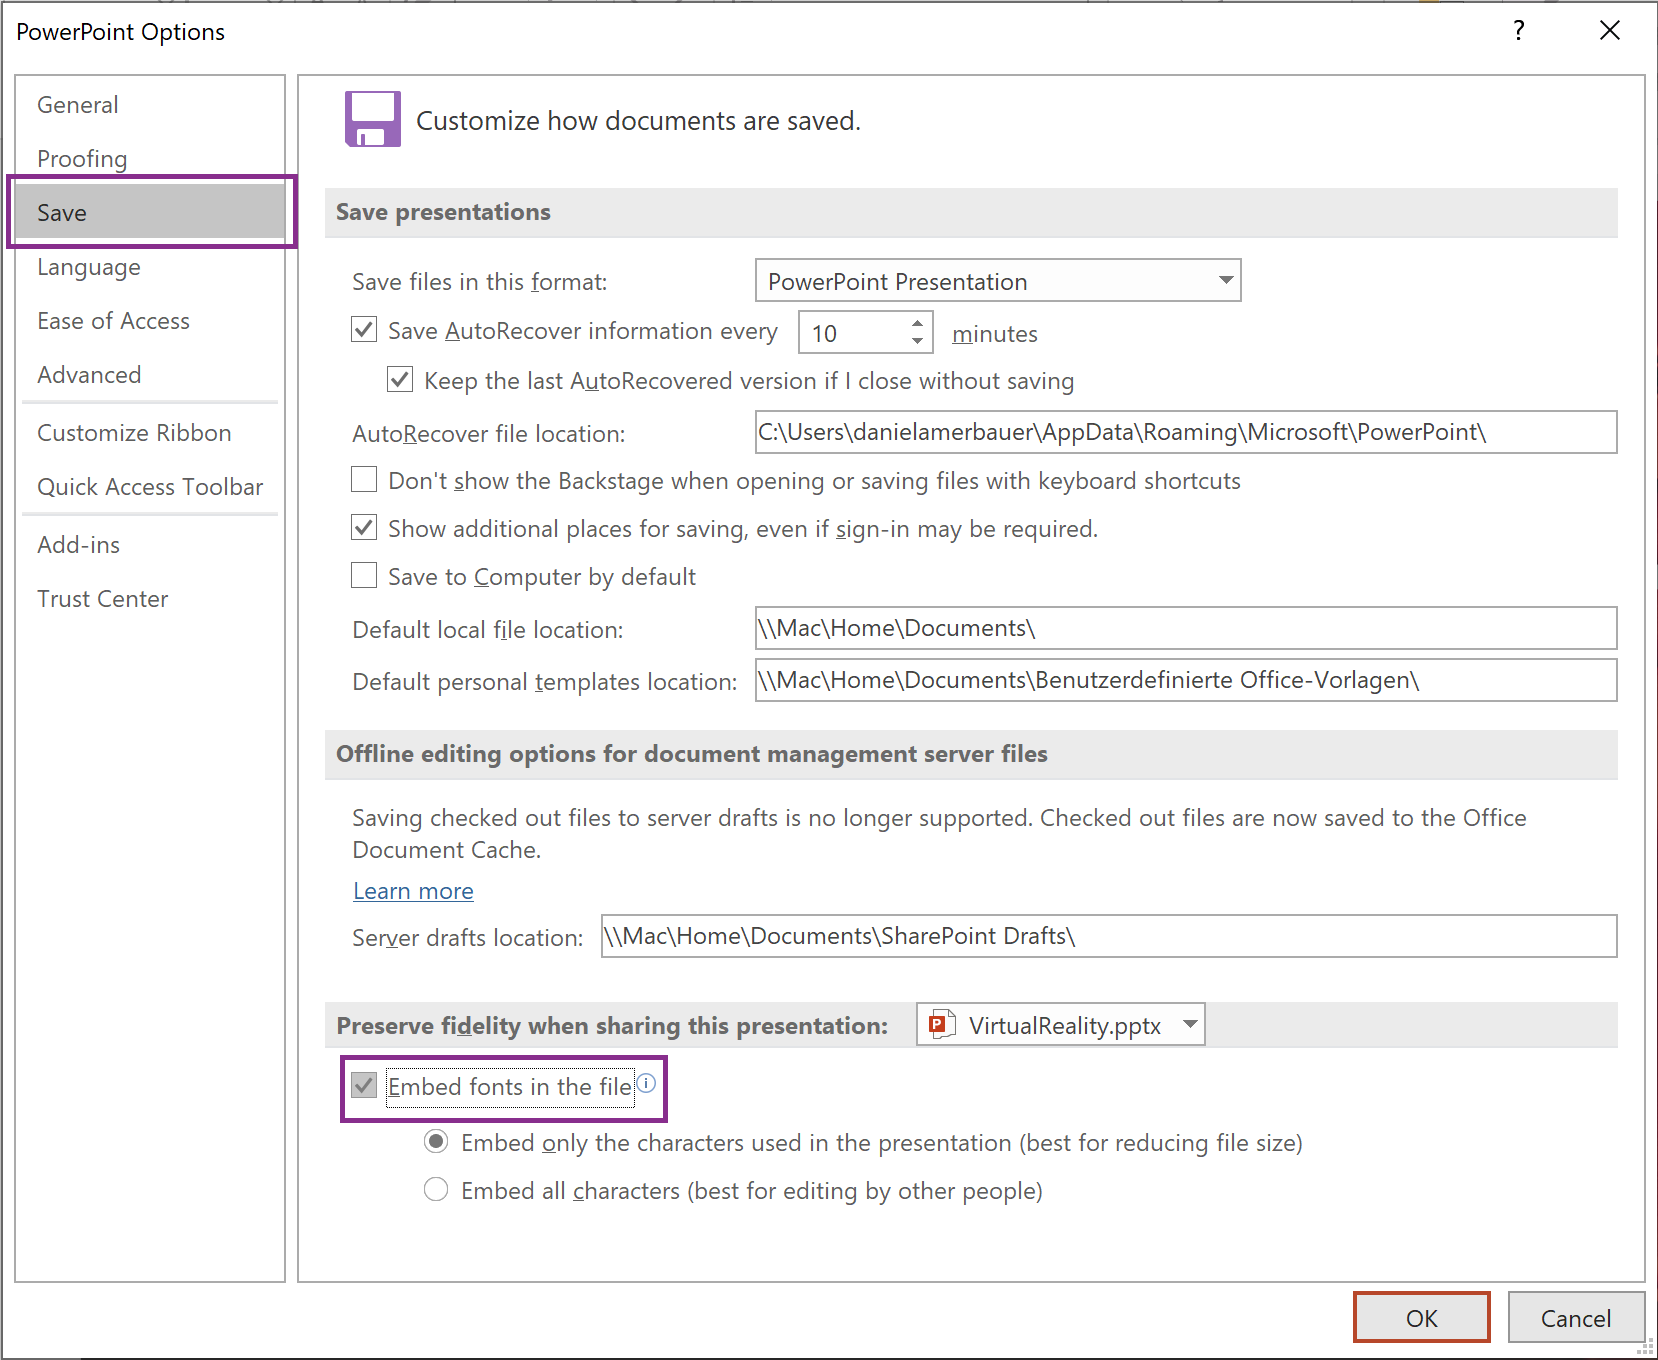
- Go to the File tab and then on Options (it can be found on the bottom left corner of the window).
- In the left column, select the Save tab.
- At the bottom, at Preserve fidelity when sharing this presentation> check Embed fonts in the file.
![]()
- Click OK.
Now whenever you save your presentation, all custom fonts are directly embedded into the file so you don't have to worry that it will look wrong on different computers!

The modern solution: Cloud Fonts
With the newer versions of PowerPoint, we got an amazing and powerful tool: Cloud Fonts. What are those, you ask? Well, as the name suggests, Cloud fonts are fonts hosted by Microsoft in the Cloud. You can download them directly in PowerPoint (or other Office-Applications for that matter) and use them in your presentations and documents!
And here's the amazing thing about it: when you open the presentation you created on any other device where Office 365 (or PPT 2019) is installed, the missing font downloads automatically from the cloud, so the fonts are protected from being replaced with other default fonts. You never have to worry about your carefully designed slides being messed up again! You need to pay attention to two things, though:
- You will need an Internet connection for the fonts to download.
- It will not work if you open your presentation on a device that does not have Office 365 or PPt 2019 (or a newer version). So if you are not sure about either of the two, it is always a good idea to embed your fonts anyway.

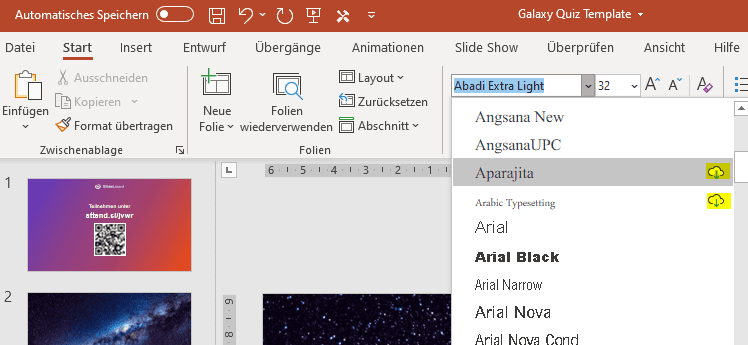
You'll recognize Cloud Fonts in PowerPoint, as they have a little Cloud symbol beside them. Just click on it to download and use them.
Common troubles
Embedding the font still not working
Font creators can define, that a font is non-embeddable, meaning that it's not allowed to package the font with a file. To check if this is the problem with you font, follow these instructions:
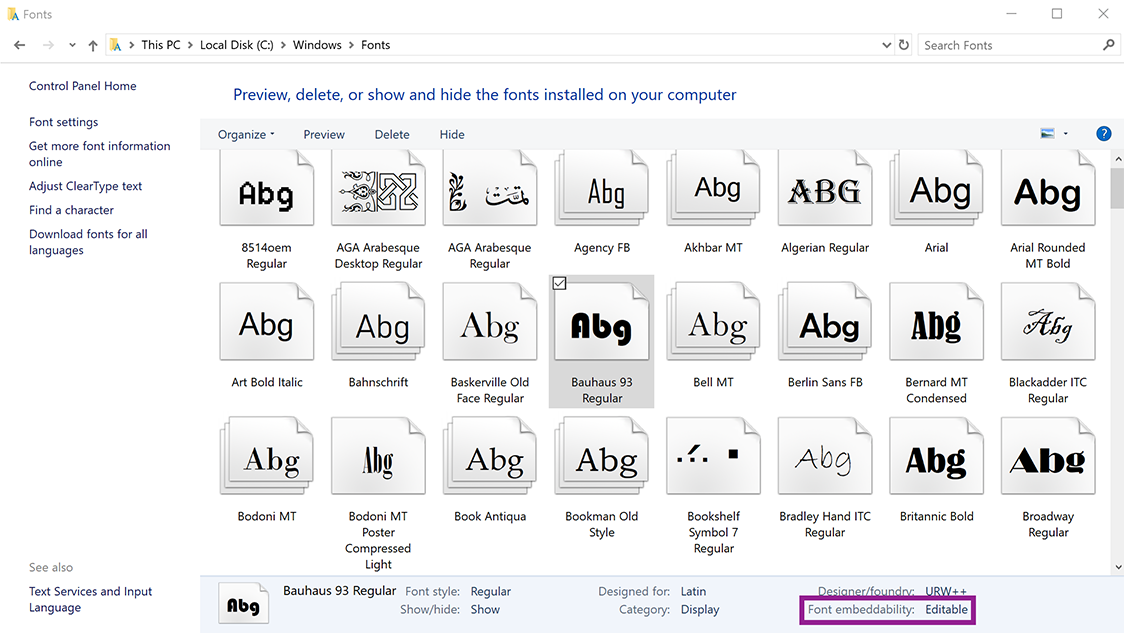
- Open the Windows file explorer and go to the folder C:\Windows\Fonts .
- Search for the desired font.
- If you mark the font you can see at the bottom right at Font embeddability whether the font may be embedded. Basically every value except Restricted means that the font can be embedded in other files.
![]()
Best practices
- If possible use OpenType (.OTF) or TrueType (.TTF). OpenType fonts consume the least storage space when embedded in an PowerPoint file.
- Avoid embedding embedding Postscript fonts(.PFB or. PFM). Several users report having trouble opening an Office document that has an embedded Postscript font in it.


