What are Harvey Balls?
Harvey balls are graphic symbols that show some form of information. You can use them to visualize ideas or concepts, making it easier for your audience to follow your presentation.
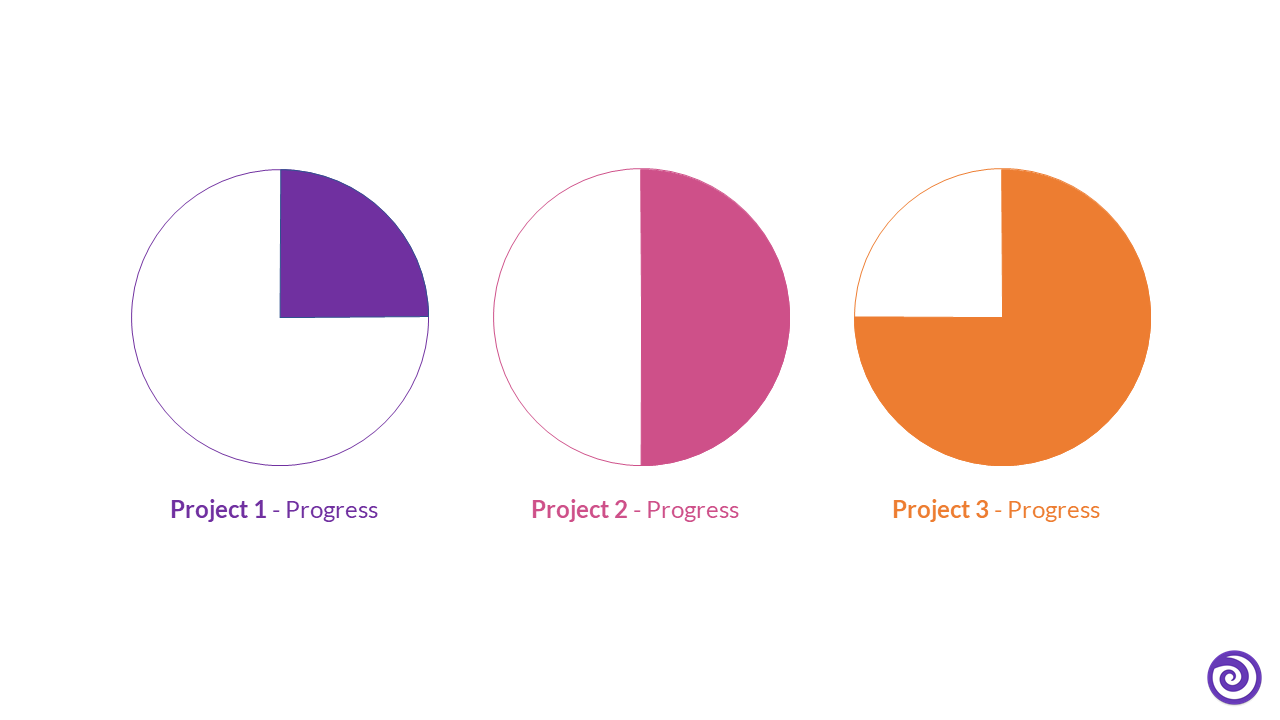
Here are the most commonly used forms of Harvey Balls:

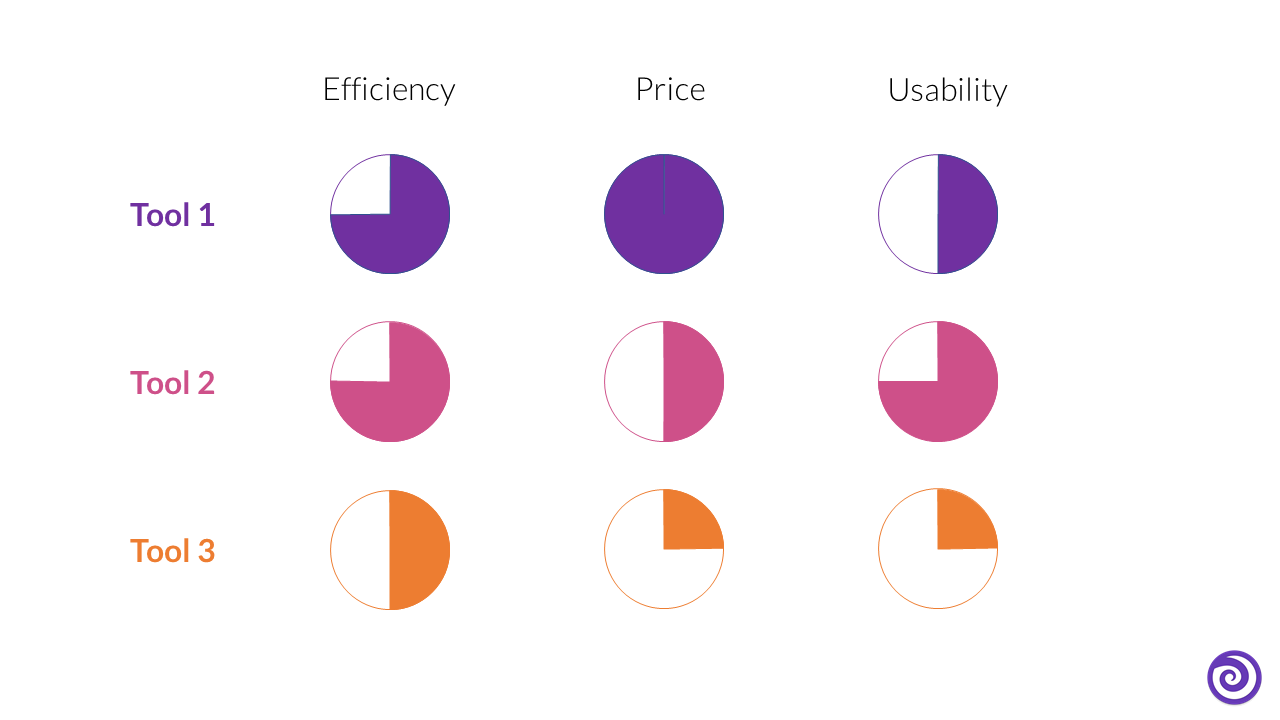
And here are two possible ways of using Harvey balls for a better transfer of information:
How to create Harvey Balls in PowerPoint
Now that you know all about Harvey Balls, the only question left is – How can you implement them in your presentation? We have made an easy to follow video tutorial for you to watch, or, if you prefer, a written step-by-step-guide down below.
Video Tutorial
Step 1
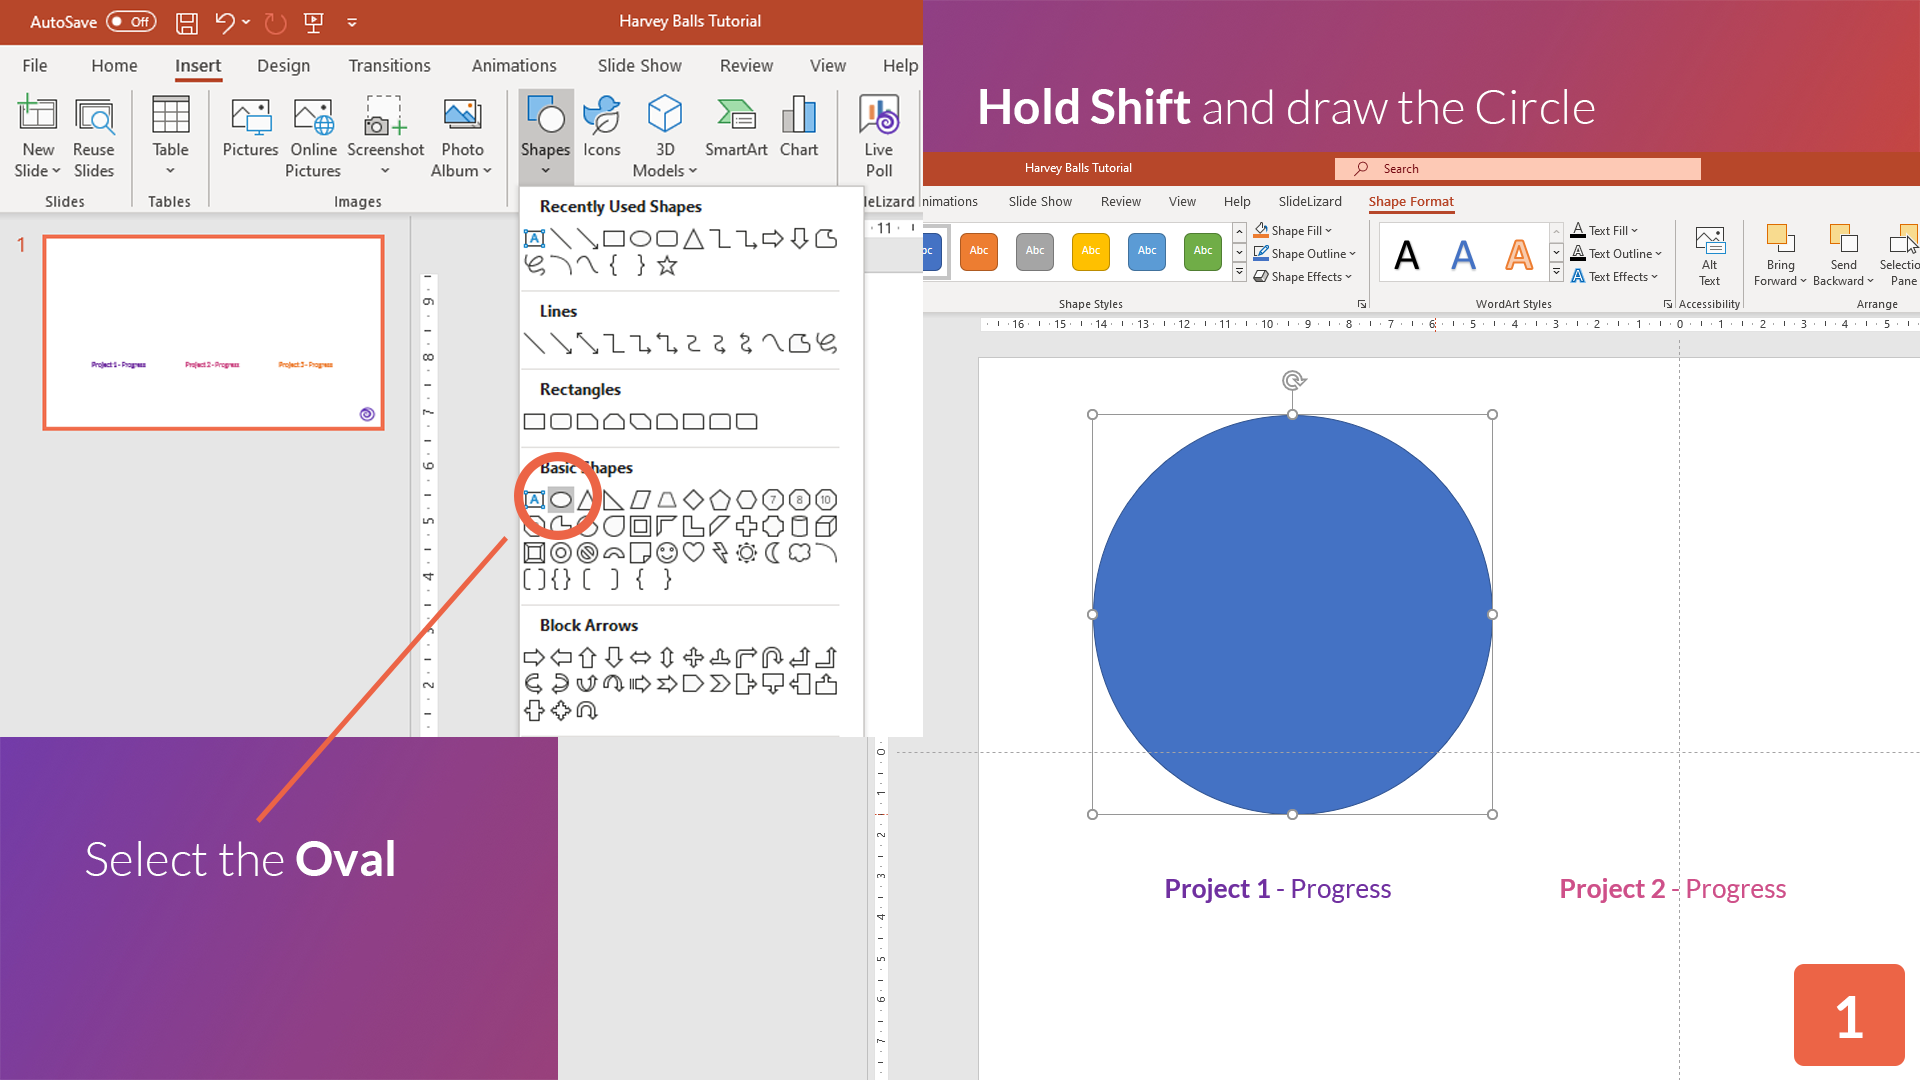
Go to the Insert tab in PowerPoint. Click on "Shapes" and select the Oval. Hold Shift (this creates a symmetrical shape) while you draw the circle on your slide.
Step 2
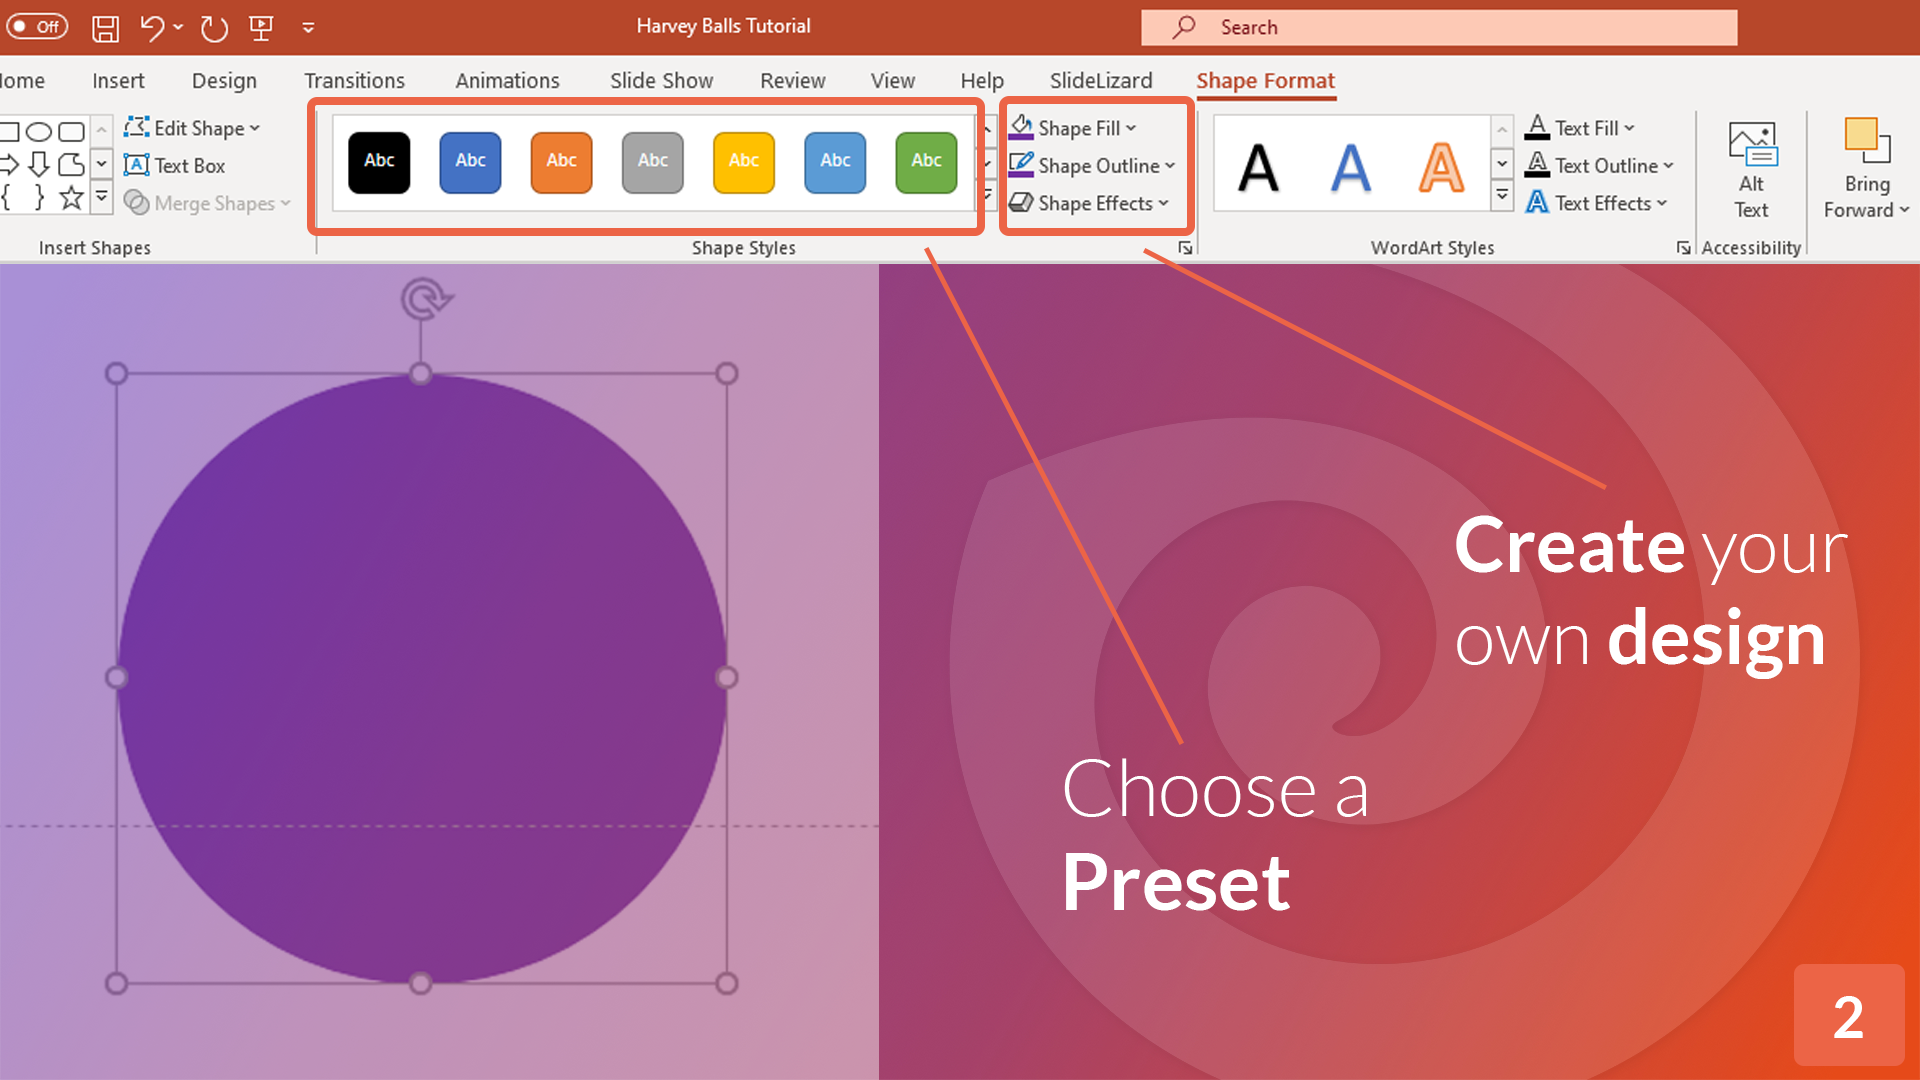
Format the circle you just created in the Shape Format tab. You can choose one of the presets or be creative and design a custom harvey ball by selecting an individual shape fill and outline.
Step 3
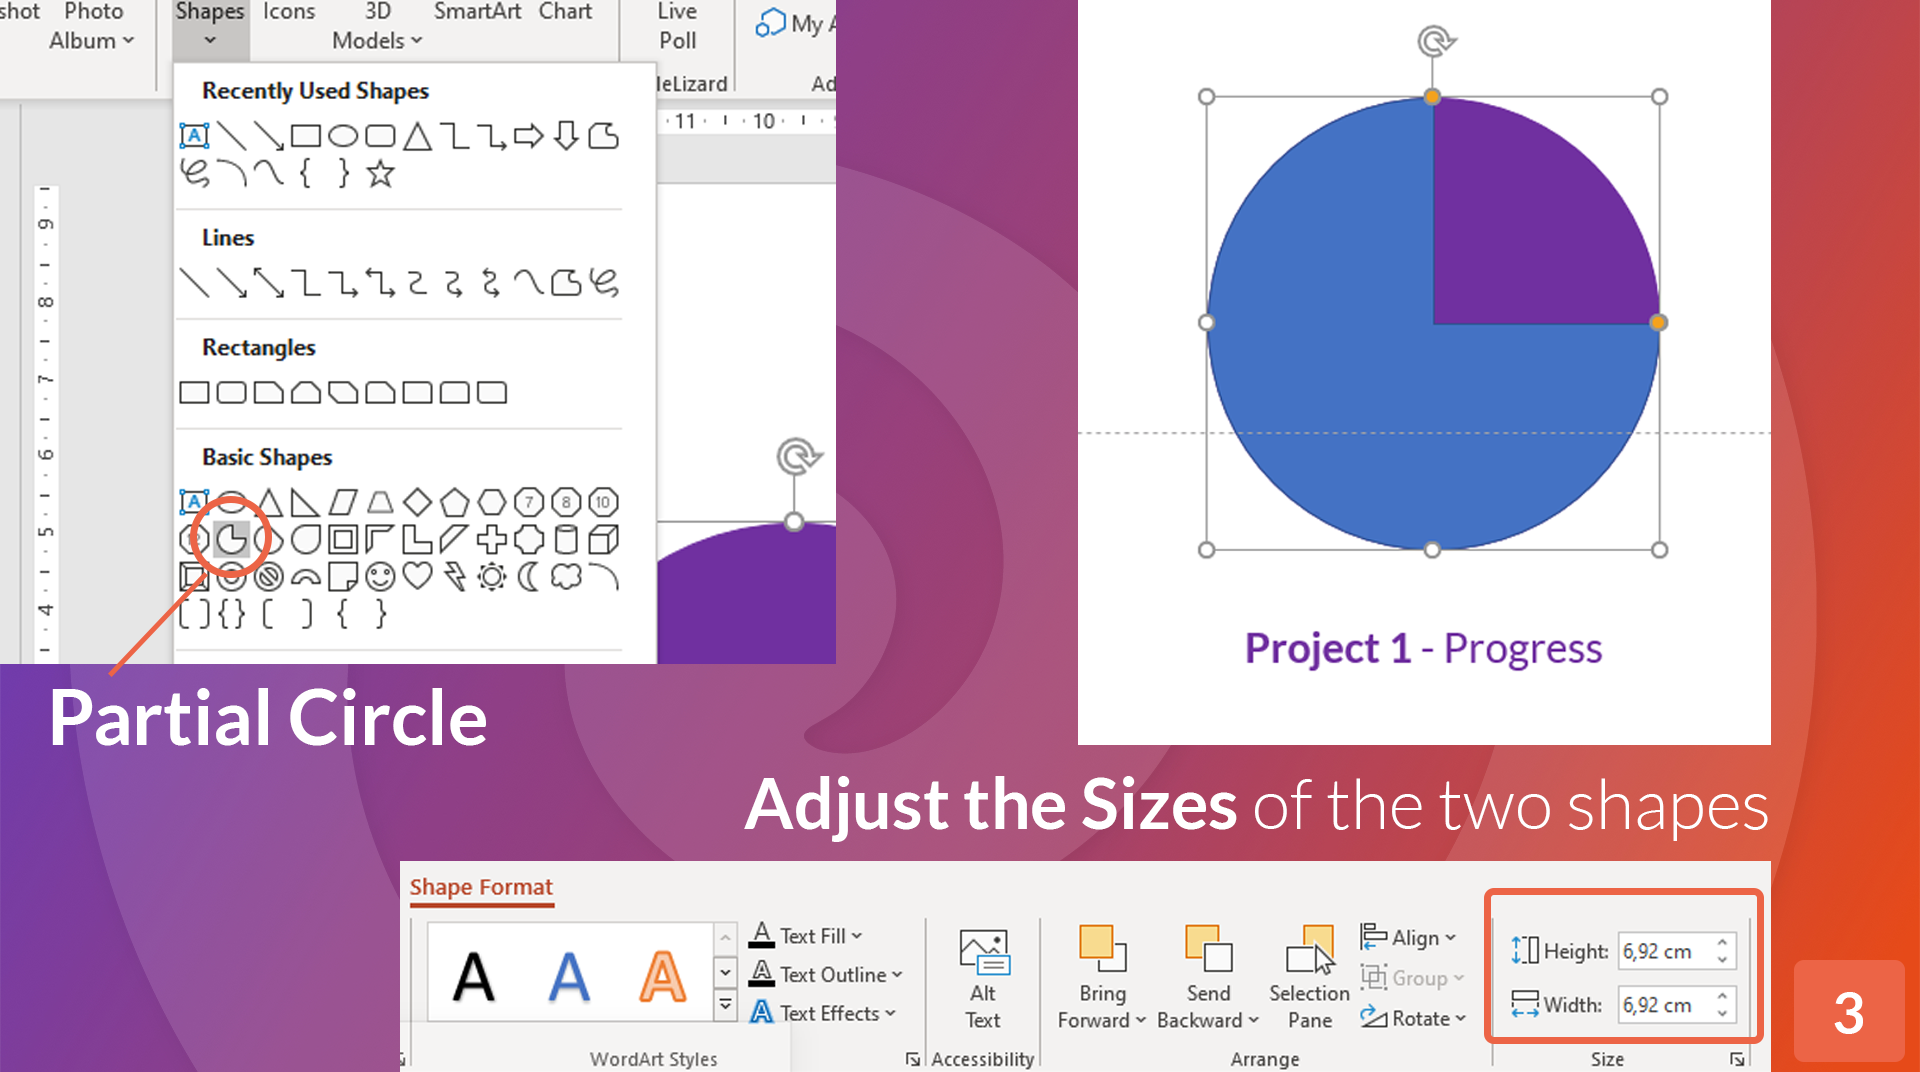
Once you’ve finished the circle design, go to the Insert tab again. This time, use the Partial circle. Hold Shift again while drawing a partial circle in the same size of the circle you created before.
You can format the partial circle in the same way you did with the circle before. You can adjust the sizes of the two shapes (they MUST be the same size!) by clicking on the shape, then taking a look at the
width and height of the shapes. You can also change the size here if they don’t match.
Step 4
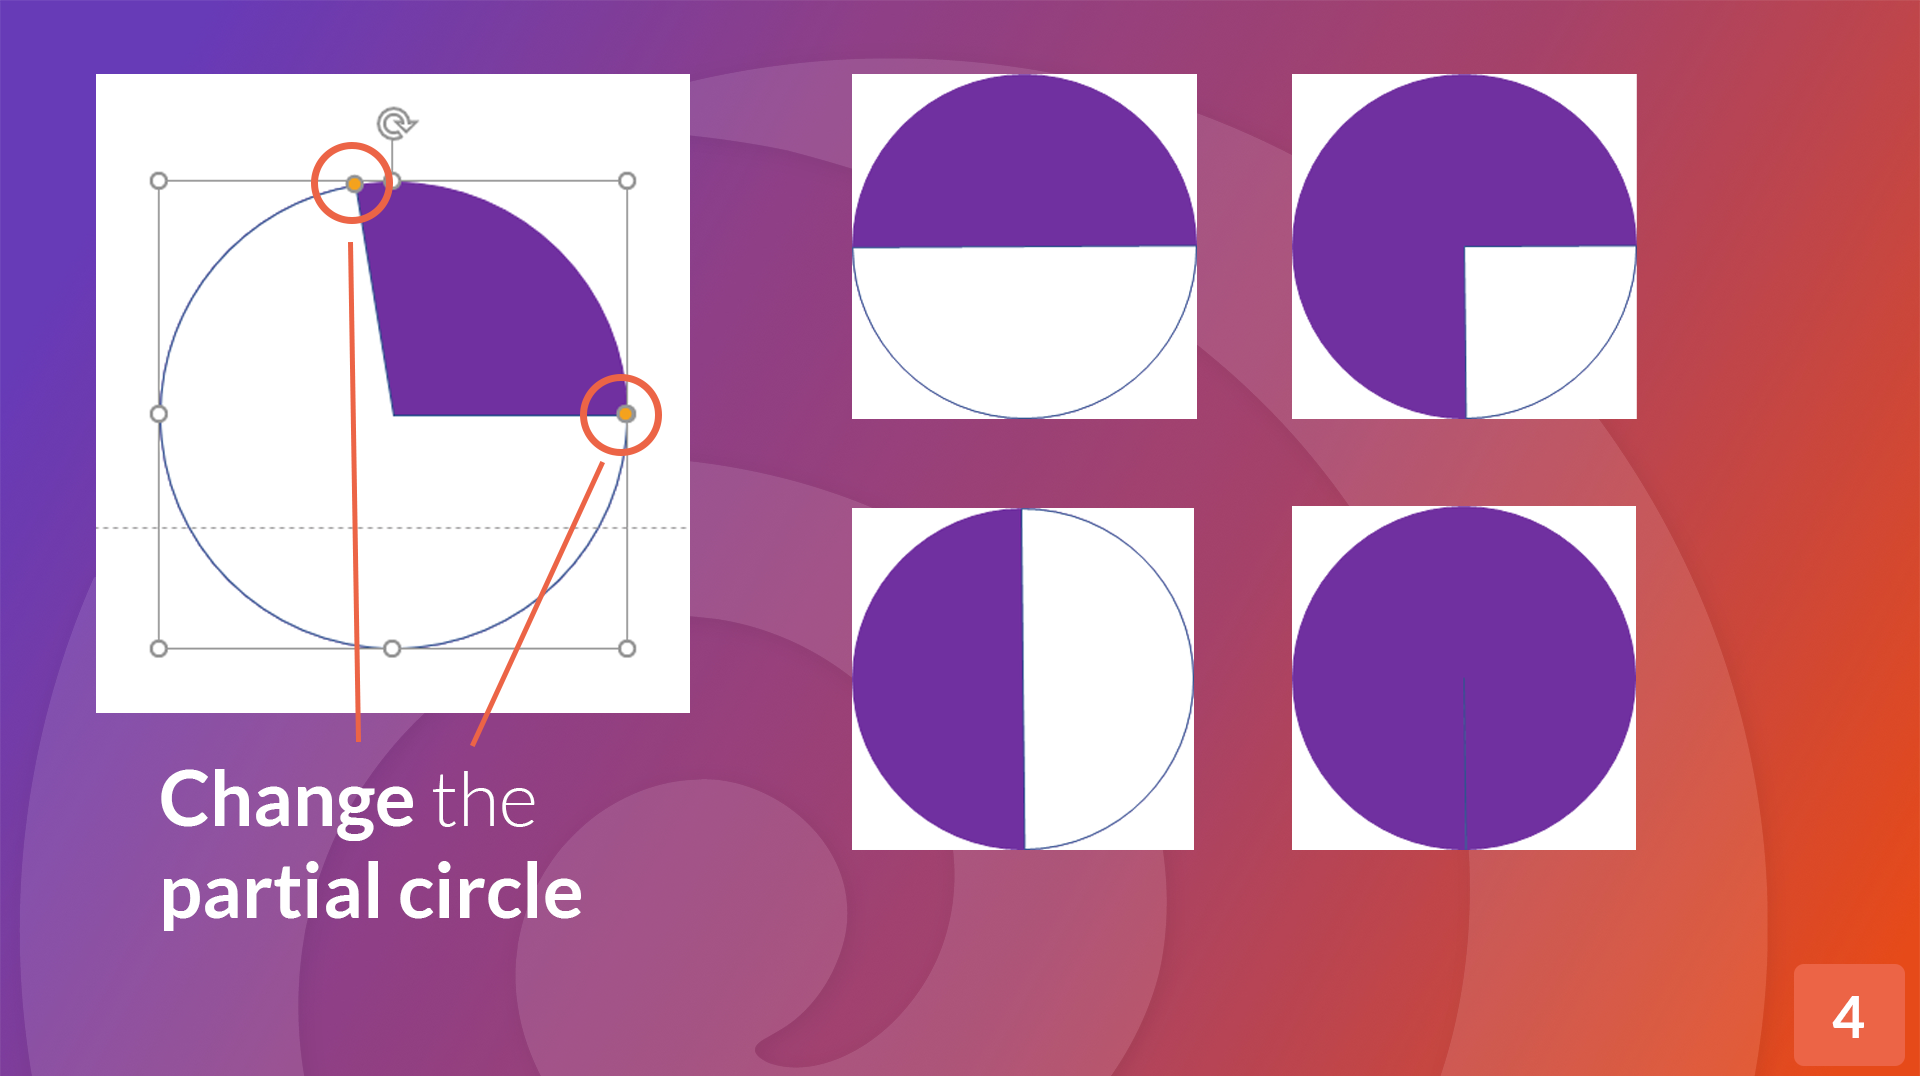
Put your partial circle exactly on top of the whole circle. The partial circle has orange dots, which allow you to change the "amount of circle" – you can now adjust the harvey ball as you like
Step 5
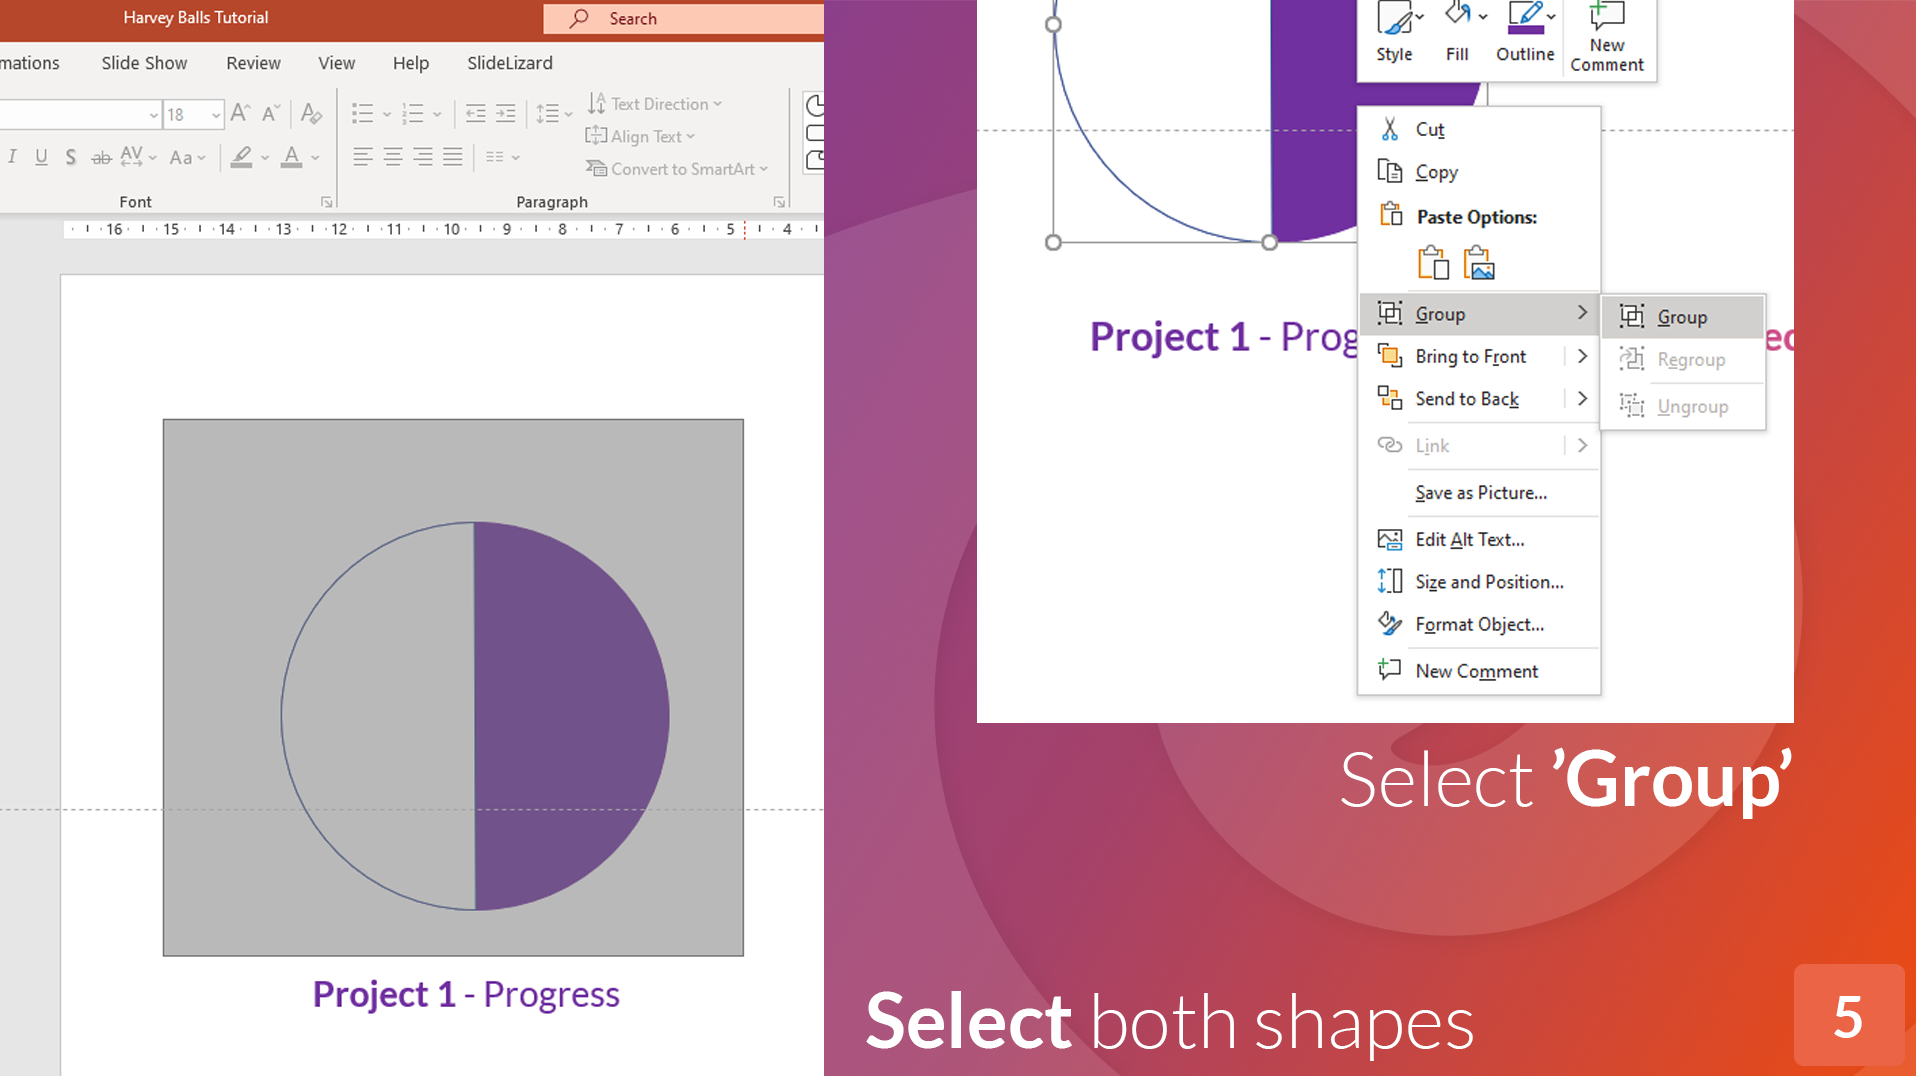
Hold the left mouse button and slide over your created Harvey ball (a little gray rectangle appears over the part you’re selecting). Then do a right click and select "Group" > "Group". This makes your two created shapes one
and allows you to move your Harvey ball around as a whole. You can still change the circle and partial circle by double clicking on them.
Creating more Harvey Balls
Chances are that you’ll need more than just one Harvey Ball for your presentation. The good news is that you basically only have to create one – you can copy that one as often as you need. You can change the size and design even after you’ve copied and pasted your circles. Just click on your (grouped!, see Step 5) harvey ball, right click and "Copy", and Paste wherever you need it.


